

When you acted out as a child, did your mother ever use the “We can do this the easy way, or we can do this the hard way!” line on you? Well, the same is true of setting up tubeless mountain bike tires. There’s an easy way and a hard way to go about things. These five tips will save you the time and headaches that can accompany your first attempt at going tubeless.
You can also check out the video below for some expert advice:
How to convert to tubeless
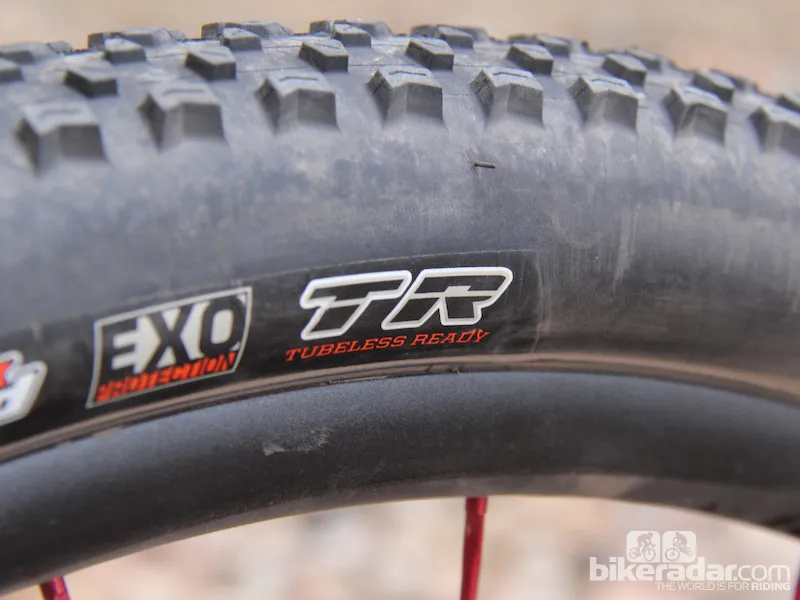
1. Use tubeless (UST) or tubeless-ready tires
This might seem elementary – almost not worth mentioning – except for the fact that many riders (myself included) have been running tires designed for use with tubes without tubes many years. There’s no shortage of tubeless-ready or true UST tires available these days (look for the badge), so stick with them for the most dependable tubeless setup.
What’s the difference between UST and tubeless-ready tires? UST stands for Universal Standard for Tubeless. This dictates tight tolerances between the tire’s bead and the rim.
UST tires generally have an additional layer of butyl in the casing, to make them airtight without sealant. They also tend to be heavier and have stiffer casings, which is one reason tubeless-ready tires have become more prevalent.
Tubeless-ready tires forgo the additional airtight layer, relying instead on sealant, but use a similar reinforced bead to aid in seating the tire.
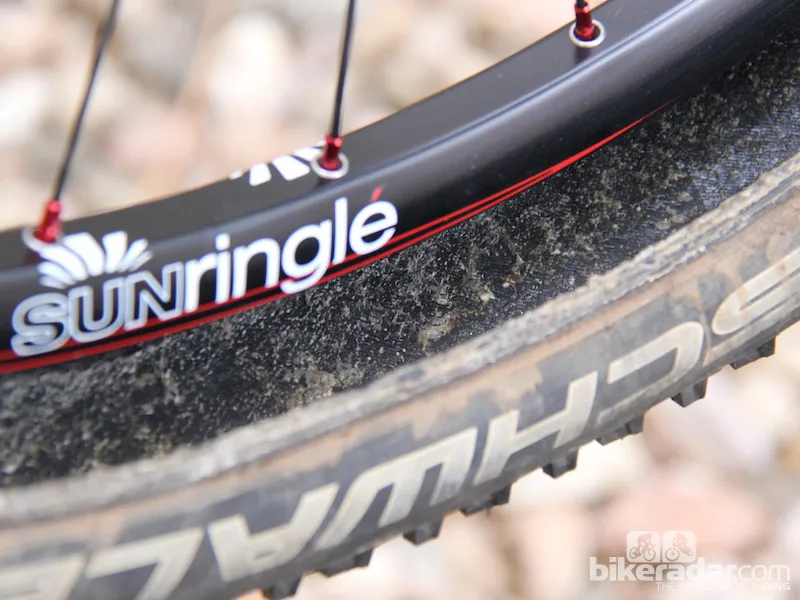
2. Use UST or tubeless-compatible rims
Again, it’s not rocket science. And, yes, many rims can be converted for tubeless use. Thankfully, the majority of mid- to high-end mountain bike wheelsets now come with UST or tubeless-compatible rims. As with tires, there are some notable differences between UST and tubeless-compatible rims.
Stan’s NoTubes rims are the most prevalent tubeless-compatible design, and several other companies license the design. In a nutshell, NoTubes rims have a shallower drop channel (the center of the rim), which aids in initial inflation, and a tighter-fitting bead hook to hold the tire in place.
A number of companies license the Stan’s NoTubes tubeless rim profile
UST rims are made to work with UST-rated tires, which generally ensures they will inflate with very little fuss. One downside of non-UST systems is the lack of adherence to tight tolerances between various rim and tire manufacturers.
There can be enough variance between non-UST rims and tires that one might need to add an additional layer, or two, of tubeless tape in order to create a tight enough interface to inflate the tire with a floor pump. Try inflating the tire without sealant first – if you can't seat it then you might need to add an additional layer of rim tape.
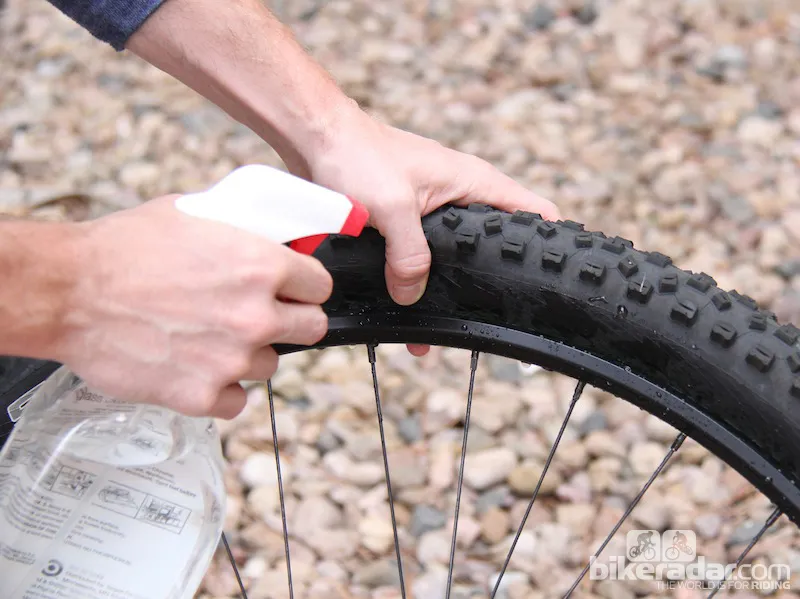
3. Soapy water speeds things along
Spraying the tire and rim with soapy water will allow the rubber to snap into place at a lower pressure. This is important because many tires, even those with tubeless-ready beads, should not be inflated to more than 40 or 50psi (depending on volume). Exceeding these pressures can cause damage to the tire and rim.
A light spritzing of soapy water on the tire/rim interface will help the bead pop into place
4. If it won’t work without an air compressor, don’t bother
This is my personal mantra. I want all my tubeless setups to be field serviceable. If I’m on a road trip or at a race and need to swap tires I still want to be able to run them tubeless. There’s one cheat I occasionally use to speed things along: remove the valve core when first seating a tire
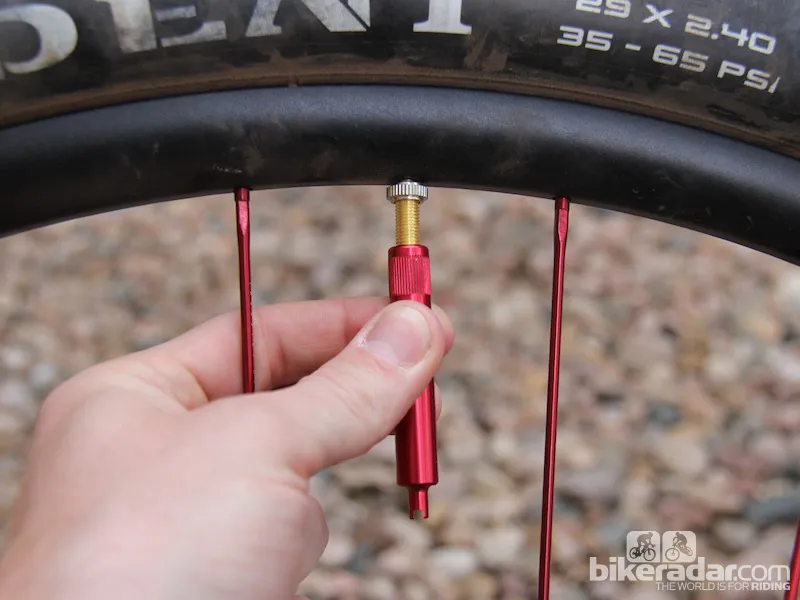
Removing the valve core will allow you to push more air into the tire faster. Once you hear the bead snap into place, remove the pump and replace the valve core. Don’t worry too much about air loss when reinstalling the valve core; once the bead is locked into place the tire will be much easier to reinflate.
5. Check your tires and add sealant as needed
Tire sealant has a finite lifespan. Make a point of checking your tires to ensure the sealant hasn’t dried out. You might find that your sealant remains in liquid form for many months, maybe even a year, if you live in a cool, wet climate. If you live in a dry climate, you might need to add sealant every couple months.
All the sealant in this tire has dried out but a fresh splash of sealant will keep it airtight