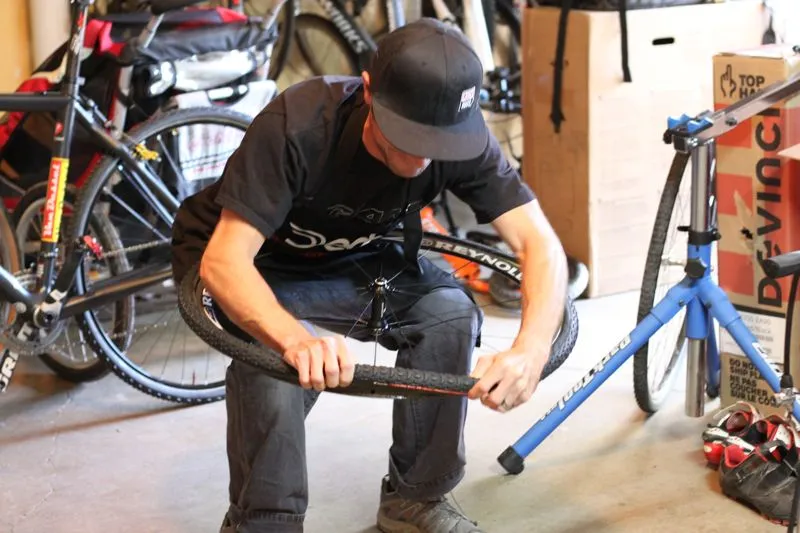


If someone came up with the tubular tire and rim design today, the technology would be laughed out of the bike industry. It's a failure-prone design and, unless you've developed X-ray vision, there's no way to check whether the glue used to hold the two together created its best possible bond.
Even the most experienced mechanics' glue jobs are subject to the fit of the rim bed and tire, which, if sub-par, can lead to failure. So taking all of the best advice – some of which is contradictory – and more than a decade’s worth of experience, we’ve come up with the following system for gluing cyclocross tires.
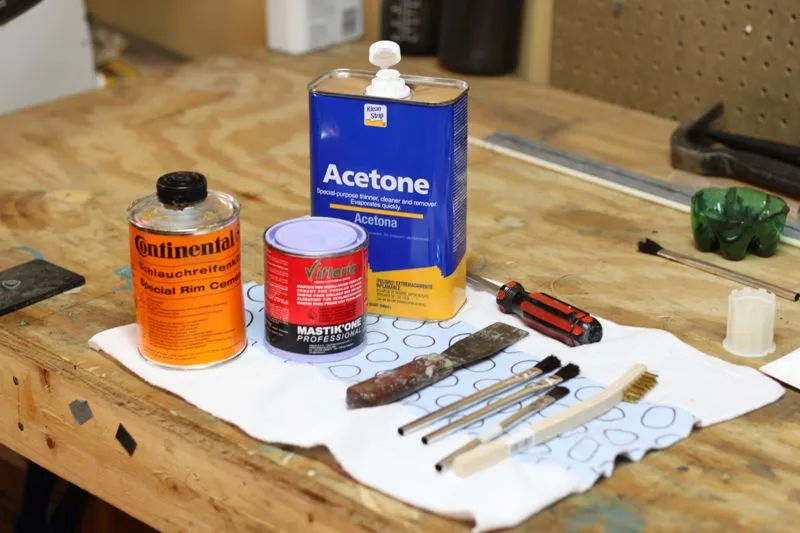
What's needed for the project:
- Time: Roughly three hours spread over 3-5 days; difference is mostly dependent on need for tire stretching time (for two wheels)
- Skill rating: Difficult
- Cost: About US$20 for tubular glue, vinyl gloves, acid brushes and acetone
- Tools: Fine or medium grit sand paper, soap/bucket/sponge, wire brush or putty knife, clean rags, acetone, acid brushes, tubular glue, vinyl gloves, broomstick, floor pump, small block of wood, shop apron or old clothing and lots of patience
1 Choose your rims and tires
A good glue job can fail for all kinds of reasons, from tire and rim bed interface (one of the most important) to cleanliness (the most important), to humidity, contamination and age.
'Cross tubulars don’t deal with nearly as much braking heat as their road counterparts but, because of the lower tire pressures, there's much more onus on the glue, as well as a higher probability of contamination.
The first place to start if you’re looking for new 'cross wheels and tires is the interface between the two components. Experience has taught us that the best bonds are made between solid rim beds or the new trend for wide rims mated with well-matched tires.
Examples of solid rim beds are Fulcrum and Mavic’s un-punctured tubular rim beds. These rims don’t have spoke hole protrusions into the tire bed, lessening the probability of contamination. At the highest end, Lightweight and the new Mad Fiber carbon wheels offer solid rim beds, too.
If you don’t select a solid rim bed, then go wide. Hed, Williams and Zipp all offer wide rims that offer more surface area for glueing and more support to larger cyclo-cross tubular tires.
If you’re running what you’ve got for wheels, whether they're old vintage GL330s or a newer set of Ambrosios or Mavics, it’s worth looking for a tire that matches your rims, especially as most intermediate condition tubulars come with similar tread patterns.
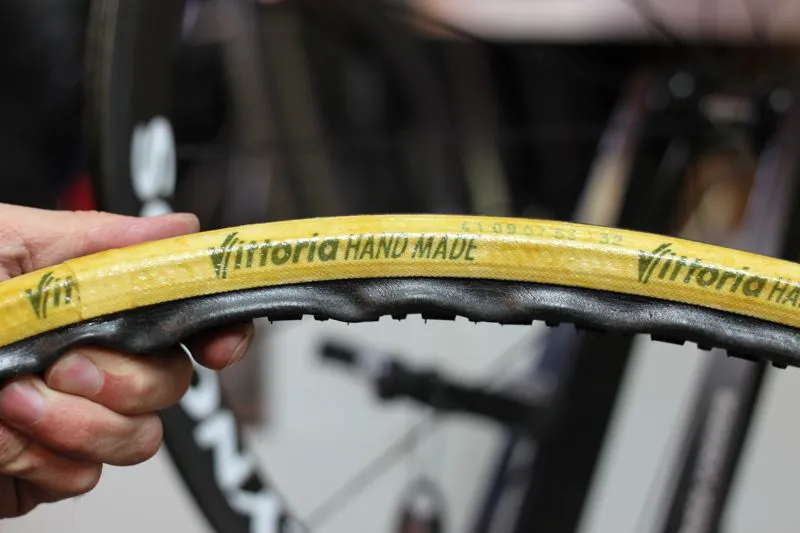
As a basic guide, narrow V-shaped rim beds generally best fit tires 32mm and narrower with pronounced casing seams, like Vittoria and Challenge. Handmade tires, from Dugast and FMB, sized 32mm and larger generally better fit a rim bed with a medium curvature, like a Mavic Reflex or new-school carbon like Zipp’s 303.
And the unique ultra-round shape of Tufo tires, especially their 34mm size, best fits the new wide rims. It can also be generally assumed that the new wide rims are better than narrow ones for cyclo-cross tire adhesion, no matter the tire.
If you already have wheels but they’re less than ideal, either with big protruding eyelets or a really deep V-shape, you can build up the low areas to make a more consistent gluing surface. We can recommend cyclocrossworld.com’s tubular tape for this job, but Dugast’s Richard Niewhuis suggests using cloth base tape glued to the rim using the same method you would with a tire.
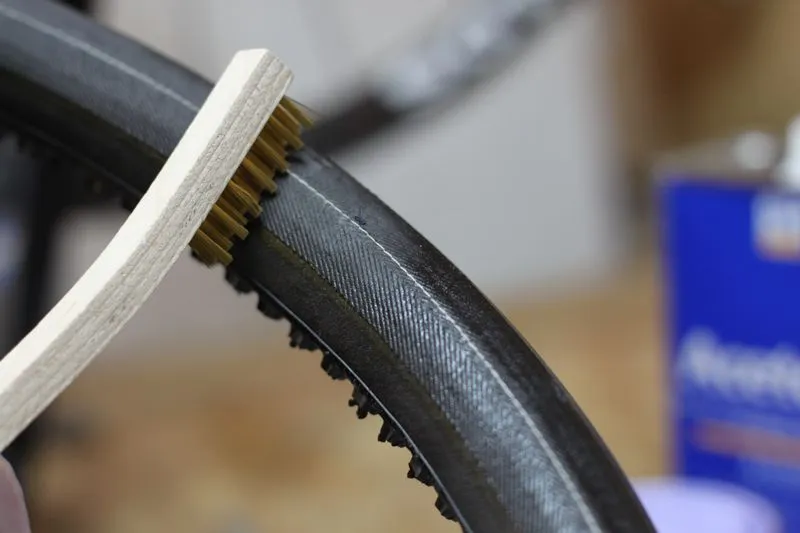
2 Clean up
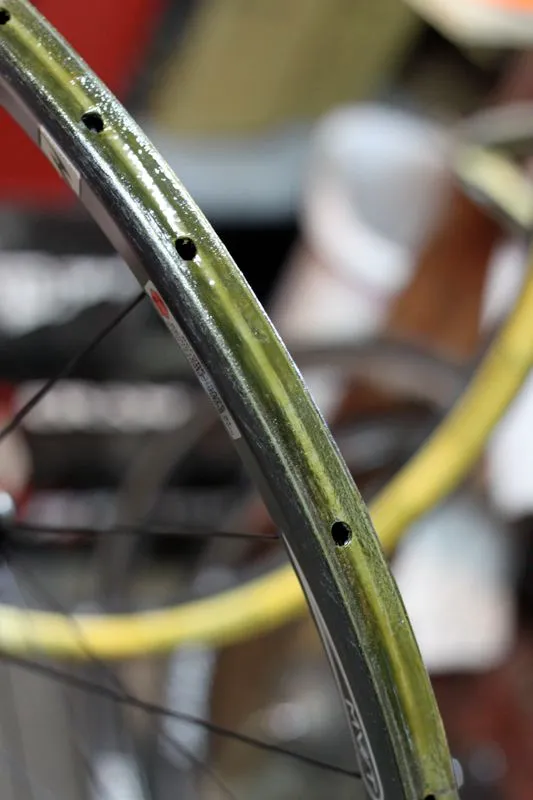
Once you have rims and tires sorted, the first step is to clean, clean, clean and clean the rim surface again. Getting that first layer of glue onto a surface that would clear a NASA clean room is the most basic and most important first step to any good glue job for cyclo-cross or road use.
With a new wheelset this generally means sanding the surface. Though most adhesion experts say sanding doesn’t do anything to better a mechanical bond, we believe it's the best way to rid the rims of carbon release agents and get shiny rim coatings – including clear coats and anodising – ready to accept glue.
It's a good idea to wear a mask during this step as carbon dust isn't pleasant to inhale. Solvent-proof gloves are also a good idea for the cleaning steps requiring acetone or the like.
Once the rims are sanded,scrub them with a sponge and soapy water to get the sanding residue off. After a good scrubbing, rinse well with water and wipe down with a clean rag. Wait for the rim to dry thoroughly before moving on.
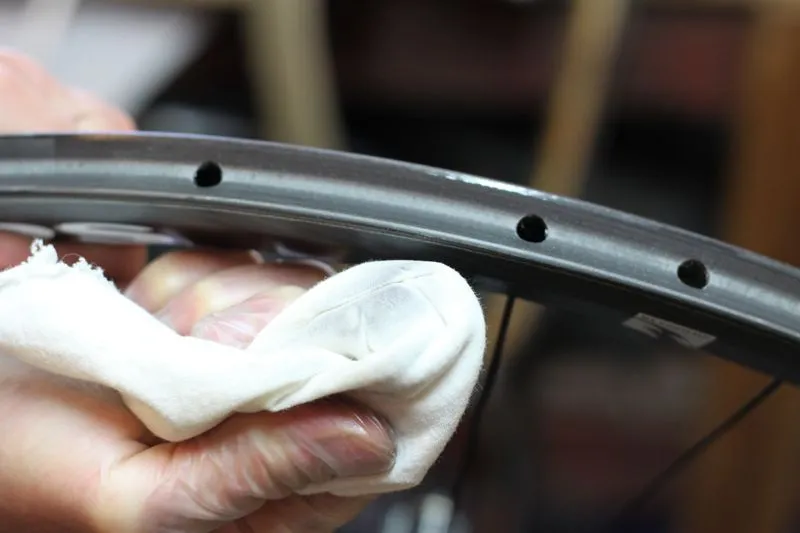
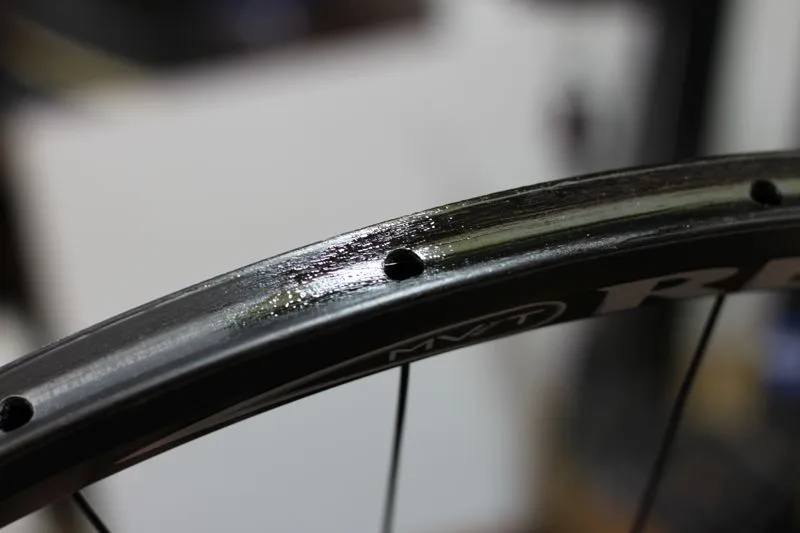
The next step is to wipe the rim’s tire bed down with acetone (preferred), isopropyl alcohol or some other non-petroleum based solvent. It'll take two to five passes to complete the job – using a clean section of rag each time – and you’ll know you’ve accomplished the task when the rag comes away clean; if it doesn’t, keep going.
Once this is done you can consider your rim prepped and ready for glue, so hang it; don’t put it on the ground and don’t touch the rim bed with your oily fingers or rag.
Once you've sanded, washed and rubbed down the rim with acetone, the rag should come away with no more residue than shown here
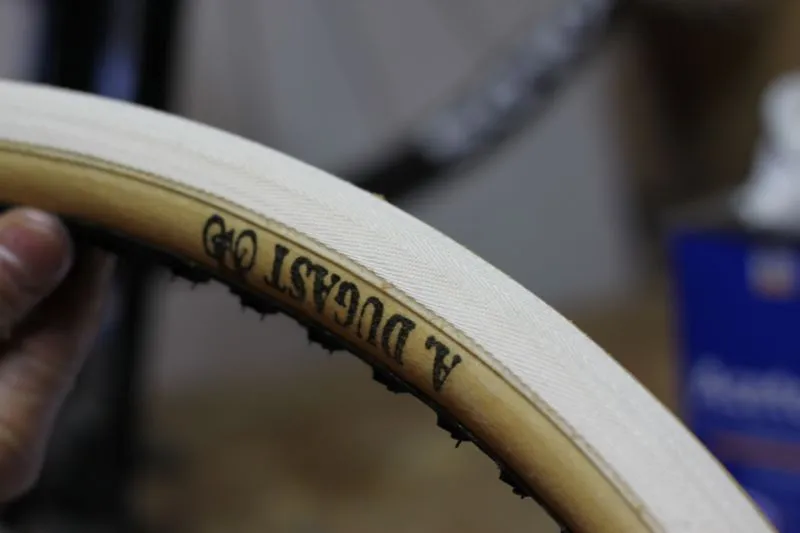
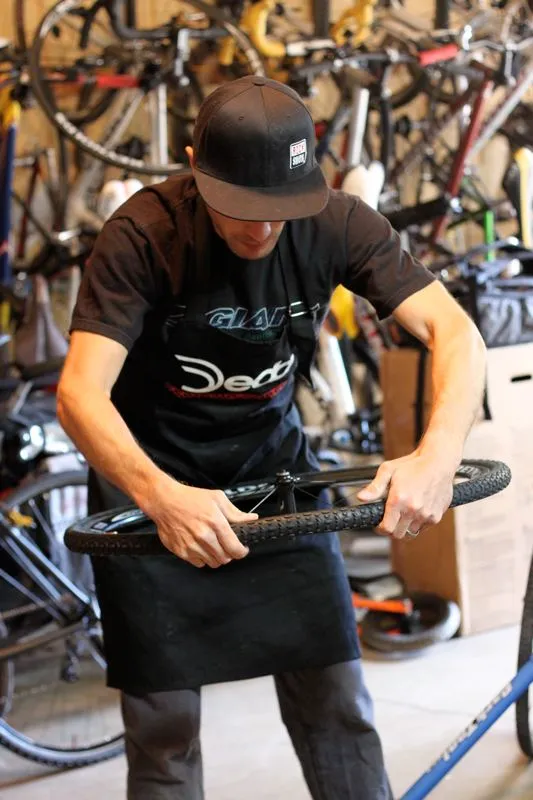
3 Tire prep
Tire prep is much easier than rim prep. Handmade tires like Dugasts and FMBs should stretch for a minimum of two days, depending on initial rim fit. Other brands may not need to be stretched at all – again, depending on initial fit.
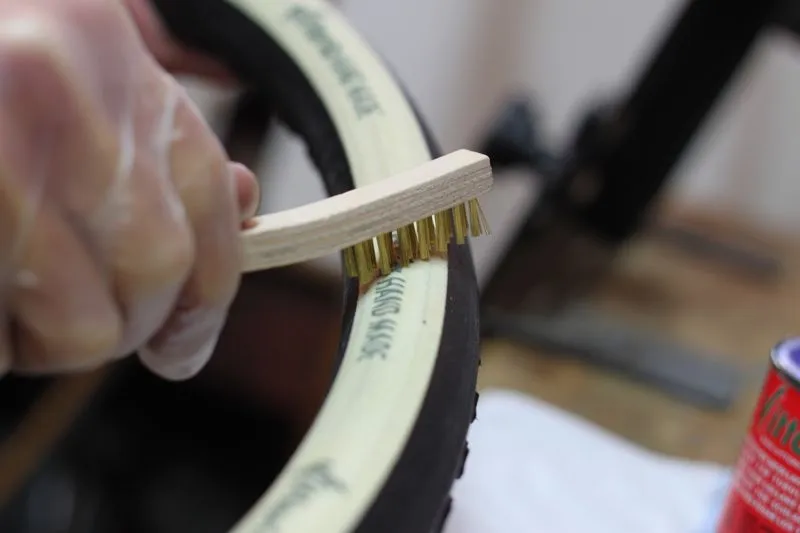
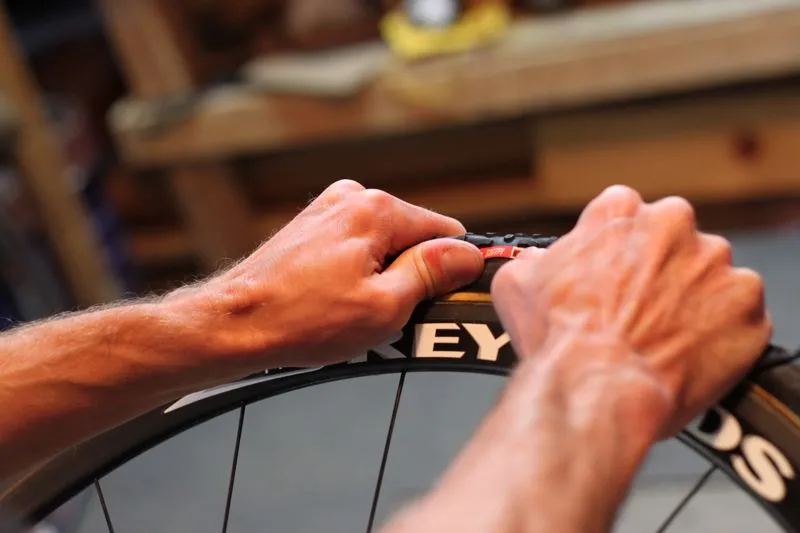
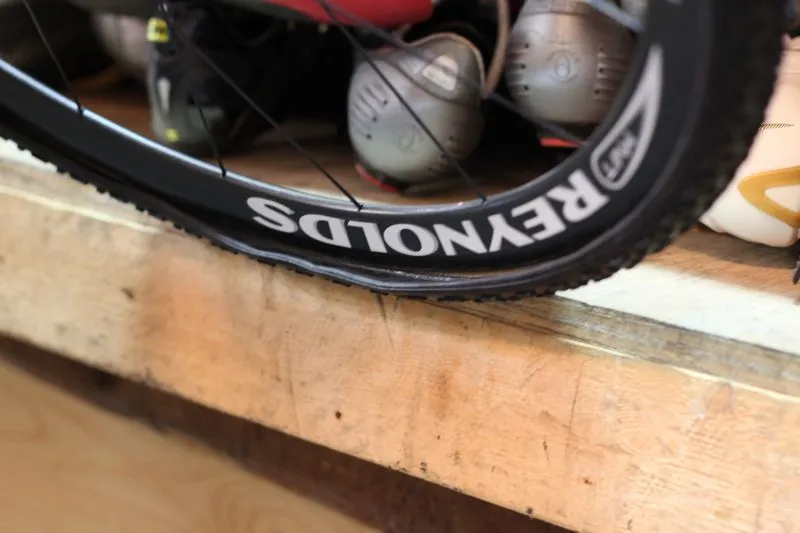
Before glueing, wipe down the base tape with a clean rag that has a splash of acetone on it. Vittoria ship their tires with a rubber coating on their base tape; prior to a wipe with acetone, gently scuff the coating with a clean wire brush or scrape with a putty knife.
You can see on this Schwalbe tire the prepped (matte finish) versus unprepped (shiny) base tape
4 Stick with it
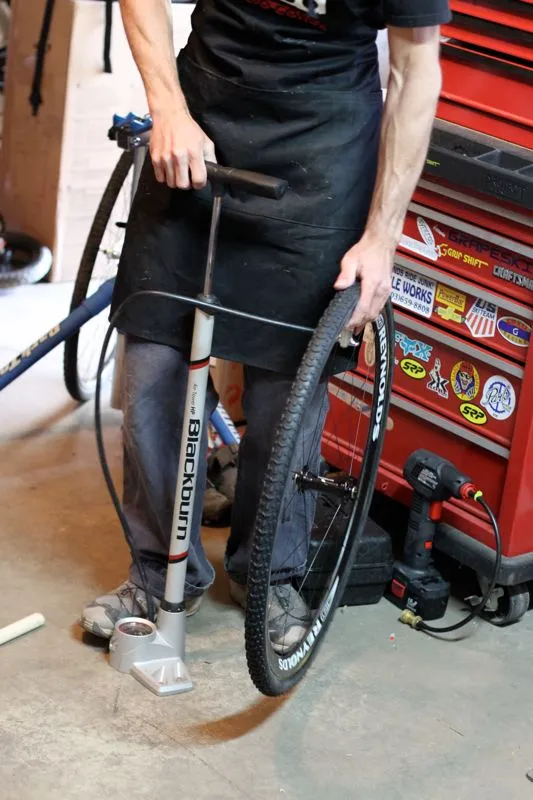
Spreading glue on your tires is the easiest step of the whole operation, but it is time consuming and smelly. For your health, it should be done in a well-ventilated space and ideally at a temperature above 60°F. If it's colder than this, warm the tubes of glue in hot water so you can get a thinner layer down on the rim.
The goal is to put three thin layers of glue – our first choice is Vittoria’s Mastik One but we’ve also had great luck with Continental’s standard glue – followed by one mounting layer on the wheel only, which we'll explain later in the process.
Supplies for tire prep and applying glue: acetone, glue, wire brush, putty knife, acid brushes
If you’re trying to build up your rim bed because of a poor tire fit, the tape should be laid down in the rim bed after the first layer of glue. The base tape should be put on after the first layer of glue has dried for 24 hours and applied onto an extra layer of wet glue.
The Belgian tape offered by CyclocrossWorld can go down with the first layer of glue, while it’s still wet. CyclocrossWorld.com can offer more advice on the proper use of their tape. If you’re unsure if you need to build up your rims for the best tire adhesion, it’s best to consult a tubular-savvy shop.
The first layer of glue; apply it as thinly as possible
Spread the glue using a metal handled, faux-horse-hair acid brush. Let the brush sit in acetone in between applications of glue, but take care to dry it thoroughly before re-using.
When only using glue, we recommend a minimum of 24 hours of drying for the first layer, followed by 24 hours for each successive layer of glue in humid climates – this time can be pushed to a minimum of eight hours in arid climates – save for the last mounting layer, which requires just five minutes of drying before the tire is applied, no matter where you are.
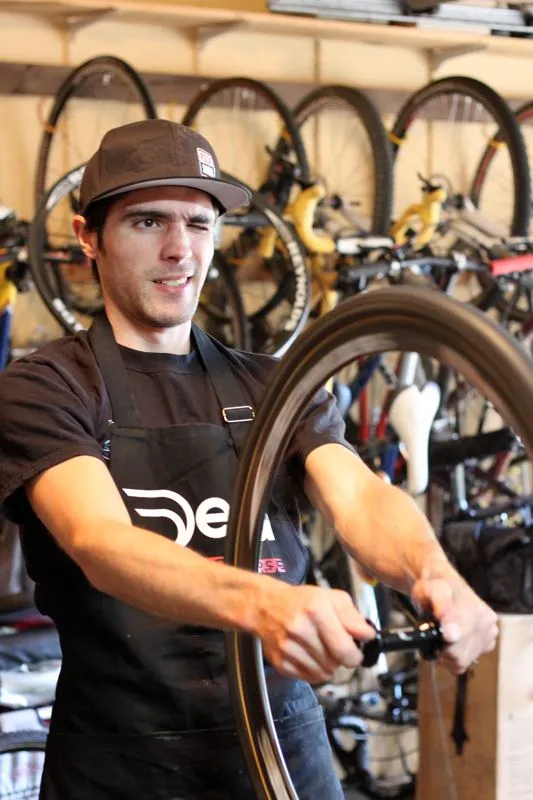
5 Mounting the tires
Okay, so you’ve got three dry layers of glue on each tire and rim surface, and you’re ready to mount. This is make or break time; your four- to six-day project is almost complete.
This rim has three layers of dried glue on it and is ready for its final mounting layer
Before you put your final mounting layer on the rim only, you need to have the following ready to go:
- A short piece of clean, splinter free wood – preferably varnished hardwood or composite board – that’s 6in long and NASA clean.
- A shop apron or old clothing you don’t mind getting glue on; you should be wearing this now.
- A floor pump ready to go.
- A long-handled broom or rake.
- A clean, dust-free area to use for the whole mounting process.
First, apply your final mounting layer of glue to the rim. Next, make sure there’s just enough air in the tire so that it’s not flat. It needs to have a slight shape – we’re talking less than 5psi here – to help keep glue off the tires' sidewalls when mounting.
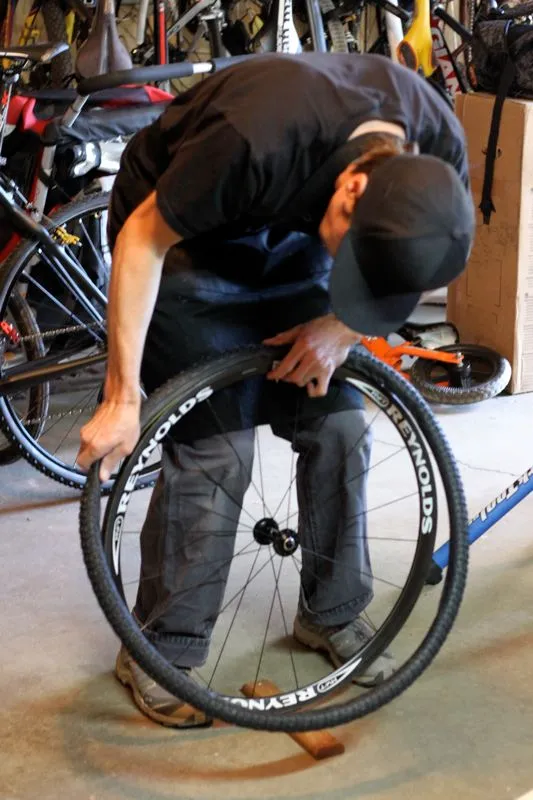
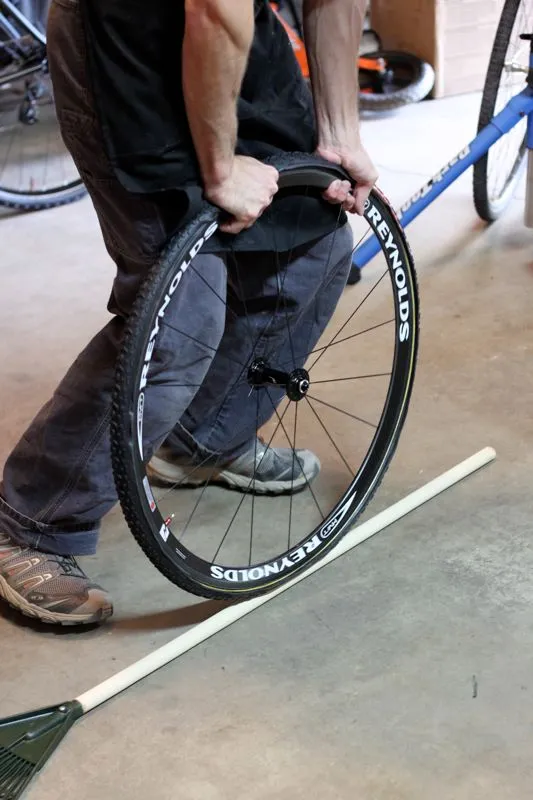
Next, with your tire in one hand, take your wheel and put it on your clean wood block. Balance it on your knees, with the valve stem at the top. Insert the valve stem into the rim, with a hand on each side and the base tape perfectly located in the rim’s tire bed.
Once the last layer of glue is applied to the rim only, give it just a few minutes and then mount the tire, starting with the valve stem at the top
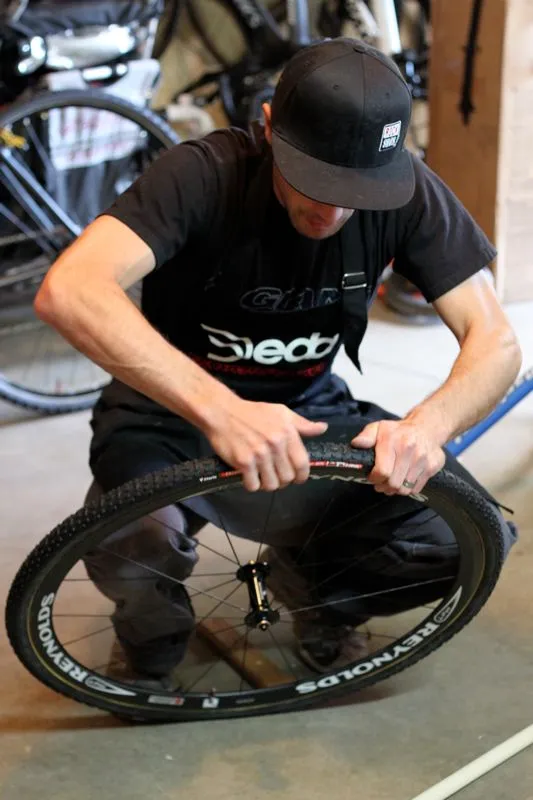
Athletically stretch the tire into the rim bed, working down to the 11 and 1 o’clock positions. At this point, jam the valve stem side of the wheel into your navel and squat using your belly, thighs and arms to hold the rim and tire in position. Now work the last 6in to 10in of the tire’s base tape into the rim bed.
Crux tubular mounting move: the navel tuck squat
6 It’s on – now get it true, quick!
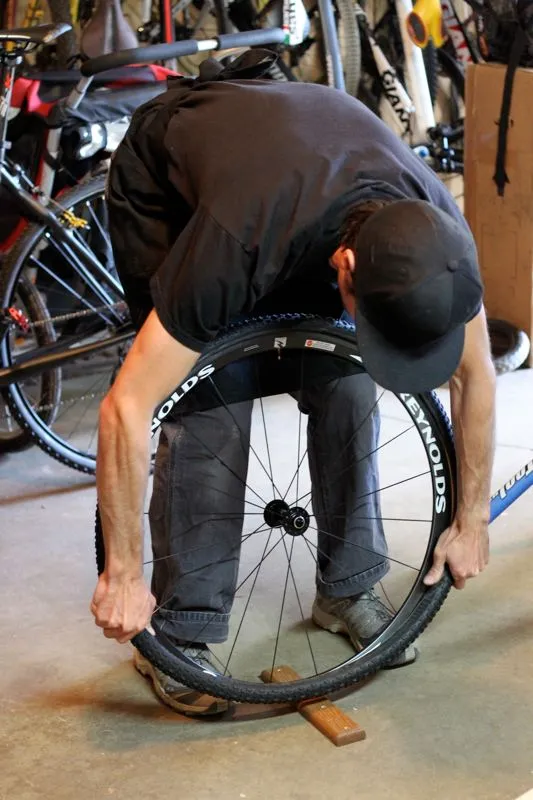
As quickly as possible, put 20psi in the tire. Centre the tire using the base tape and rim interface, or the tread’s overall orientation. The first technique works best with very true tires like Vittoria and Tufo, while the second technique of looking at the top of the tread versus the rim is best used with Challenge, Dugast and FMB rubber.
Spin the wheel, checking for tire trueness
No matter the initial truing method used, as a final check spin the wheel. Watch the top of the tread for hops and wiggles, fixing as needed. Once as true as possible, pump to 60psi and check for trueness again, then let all the air out. Using the broomstick and 80-90 percent of your weight, press the deflated tire into the rim bed all the way around the circumference of the wheel.
Use a broomstick or rake handle to push the base tape into the rim bed after the tire is true
Inflate the tire to 60psi and then let it sit for 24 hours. After the final cure, deflate the tire and check its adhesion all the way around its circumference, by trying to gently pull it off. If it comes off easily, add glue to that area or peel the tire and start again.
If the bond is good, one final, optional step can be taken, which is to apply an extra thin bead of silicone caulk to the rim/tire base tape interface and valve stem to keep out contaminants.
Now the only thing left to do is to rip past your competition with 25psi in your tires (obviously, course dependant) knowing that they've been mounted specifically for cyclo-cross.
Notes:
- This process is easier to do in bulk than on single wheelsets, since you can’t speed it up. So, if you have multiple wheelsets, think about doing each step assembly line style instead of looking at each wheel as its own project.
- If you suffer a flat tire and can get it off without removing the first layer of glue from the rim, you can generally clean that layer of glue and add another layer, plus a mounting layer, to it. So, unless a rim becomes contaminated, the first preparatory steps only need to be done once every couple of years.
- The tire/rim bond should be checked weekly throughout the season – especially after muddy events or power washing – for integrity and re-glued whenever they pull off easily.