
Bike racing is all about aerodynamics and when I was a professional cyclist I spent a huge amount of time looking at this cycling fundamental.
When on anything other than the steepest of inclines, more than 80 percent of a rider's effort goes into simply pushing air out of the way. If we take that energy spend and break it down, only 20 percent is the bike, the rest is the riders body forcing itʼs way through the air. Bike aerodynamics is important but as you can see, changes to body shape will yield the largest returns.
Wind-tunnel testing is a fantastic way to accurately measure the effect of any changes to riding position and allow accurate fine-tuning. The definitive numbers it throws out give a lot of confidence to make changes and give direction. It’s also extremely expensive.
The good news is that the vast majority of the gains can be had at near zero expense. Even as late as the year 2000, the preferred working method for my coach Peter Keen and I was a simple full length mirror, an SRM ergometer and a basic set of principals. All of this was achieved in Pete’s garage and the good news for you is that these theories were later born out with the expensive wind tunnel method.
Here’s how we did it:
The setup
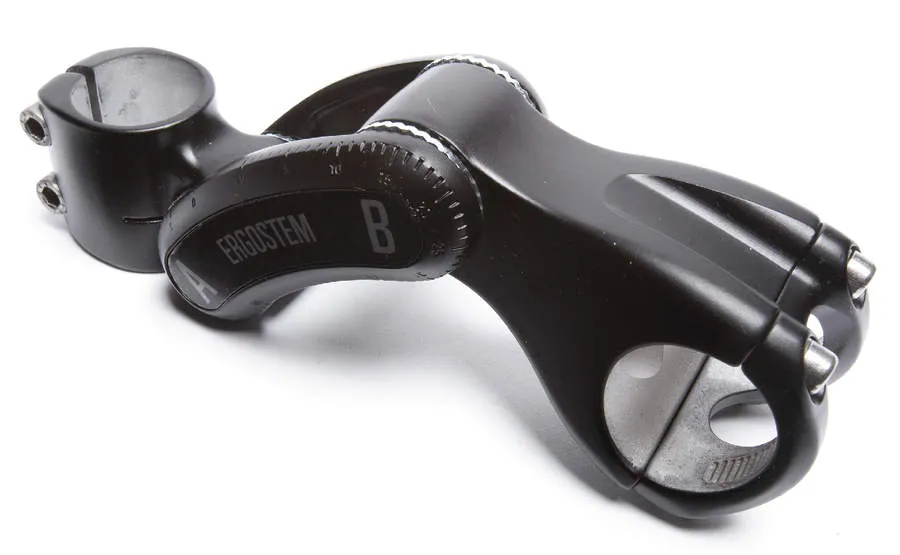
Look Ergostem
You don’t need an SRM ergometer (effectively an infinitely adjustable exercise bike) an indoor trainer set level will serve just as well, with the full length mirror placed directly in front of you. A Look Ergostem is a great investment for this kind of thing as it allows a huge amount of adjustment to be made quickly.
The base bar is not important as the focus is on the ‘in-board’ position, I used to use a set of cut-off drop bars mounted with a set of Profile clip-on tri-bars, these are hard to find now but their telescopic design allowed a huge variation.
Remember your test set up doesn’t have to be pretty, it is to give you scope to explore position.
During these sessions, Pete would be there walking around and offering suggestions, we’d then make adustments. The observer is important as they have a 3D view of the rider, a completely different perspective and when combined with the riders opinion on how it feels (something only the rider can know) you have a fully rounded view.
The method
The human body is fundamentally a collection of tubes, a very un-aero set of ingredients that are fixed in shape. So, using this experimental set-up, our fundamental aim was to create the smallest ‘silhouette,’ as seen from the front, that was sustainable.
This was done by rounding the shoulders, bringing in the elbows, and maybe going lower, although this isn’t always better. Forcing the body lower often makes the rider put their head up under stress and so increases the size of the silhouette.
Similarly, going arms-longer, looks more aero from the side but it is a lot more uncomfortable/inefficient than having forearms under the torso at near 90 percent and doesn't actually reduce the silhouette.
All of this was done pedaling with a reasonably high power output, about 50 percent of threshold and we made a point of measuring nothing, just going on look and feel, this kept us open minded to explore new ideas. Remember, this is just experimenting – you don’t have to keep any of it so play around and don't reference back to reality too soon. More on that in a moment.
The trial
Once we had something we both felt was the right compromise, I would then stay on the ergo and complete a 10 minute block at near threshold effort. This was the acid test. I didn't expect the new position to feel comfortable, that would take time but I was looking for an indication that with training, I thought I could adapt to it.
The result
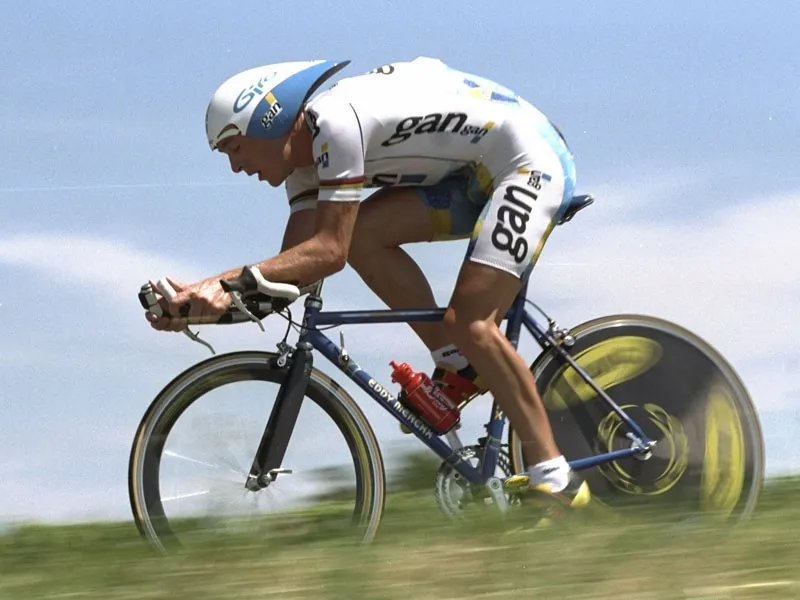
The hour record bike that Boardman rode in 2000
Only at this point, when I had decided this was a desirable position to commit training time to, did we take measurements. We were often surprised by these and reflected that had we measured on-route, we may have stopped exploring in a given direction because ‘those stem lengths would be silly‘. Not measuring was how we stopped tradition and preconceived ideas getting in the way.
The Hour Record bike of 2000 was a perfect case in point. When I asked people if the position looked okay they said yes. I then told them the dimensions: A 17cm stem, 63cm top tube and 53cm seat tube. People couldn't believe it. I doubt if the positioning session had been done measuring as we went along we would ever have optimized the position so well.
It doesn’t have to be so outrageous though, and you should be able to make the changes you need to just about any bike. It may be simply that you just need to change a couple of bits such as the stem or tri-bars, but it doesn’t have to cost the earth.
The measurement
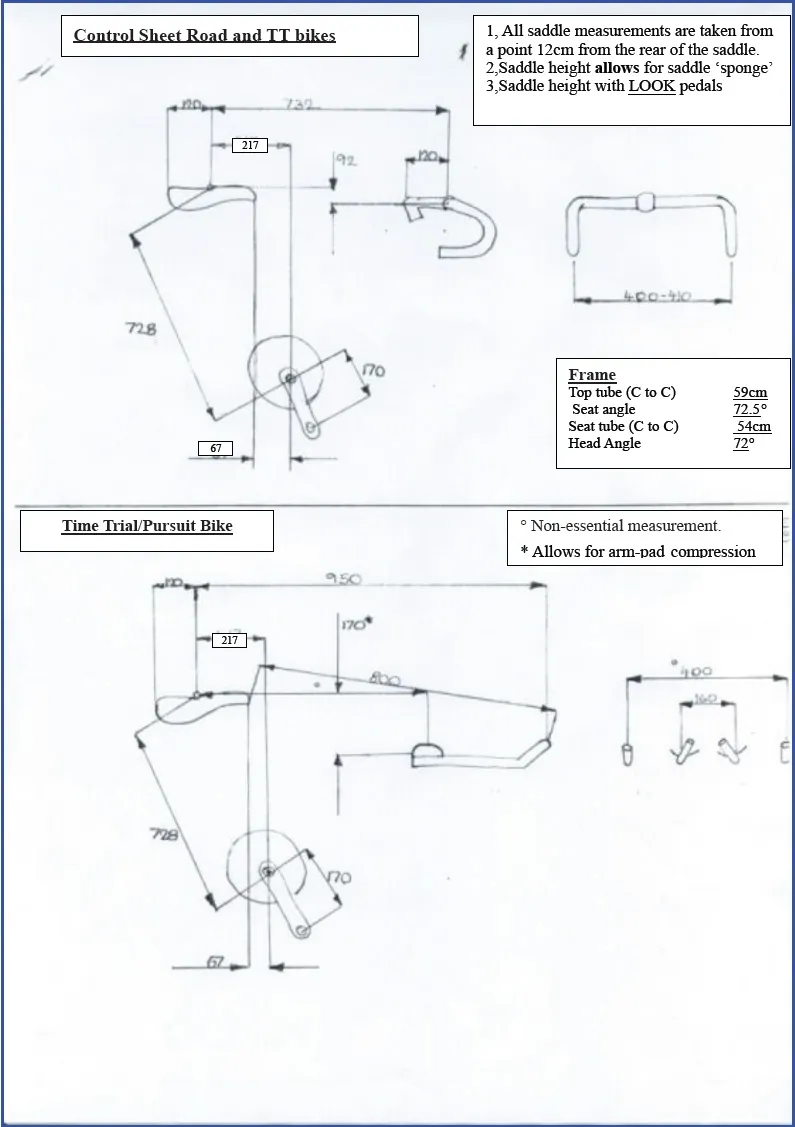
Chris's own positional measurement sheet
Once we were confident with the position, we’d take a set of measurements, and turn them into an outline drawing. Drawings were great as there was less ambiguity over where something should be measured to/from and it was multi-lingual, important for me working with a lot of different nationalities.
The training
There’s no point having a new position and then barely using it for more than race day and expecting it to work. This is the part often overlooked. Changing position takes commitment.
We devised a number of 'weight training' type exercises to help this adaptation, to train the various muscles to fire smoothly in this new configuration. The details of these is probably the subject of a different article but suffice to say, a significant amount of time will be needed to give yourself the best shot.
Chris Boardman is an Olympic cycling gold medallist, multiple world champion and world record holder, and has won three stages of the Tour de France. He is also head of research and design for Boardman Bikes
Five ways to test your drag
By Phil Mosley
Too much drag can add minutes to your time trial times. Here’s how to test how speedy your equipment and riding position are.
1 Roll down test
Cost: Free
Find a long hill with an uphill at the end (a bit like a ski-jump). Start from a standstill, do not pedal, just roll down the hill and see how far up the other side you get before grinding to a halt. You can then repeat the test using different riding positions and equipment and see what difference they make. Just make sure the weather isn’t changing, as differences in wind and air pressure can give false information.
2 Camera trick
Cost: Free, but takes time and you’ll need photo-editing software
Get someone to take a digital photo of you on your bike, from an exact spot directly in front of you. Using photo-editing software you then need to cut out the frontal view of the rider. You should then be able to see how many pixels are in this cut-out image. You can then make changes to riding position and equipment, and providing you take the photos from exactly the same spot, you can compare the number of pixels in your cut out images. Generally speaking, the smaller you can get your frontal area, the lower your drag will be.
3 Chung method
Cost: Free, but you’ll need a cycle power meter
As the name suggests, this is a method devised by Robert Chung that helps you estimate your drag coefficient. There are several websites that do the maths for you, so all you need to do is enter the data. The lower the coefficient, the faster you’ll go for a given effort.
You’ll need to record several variables, such as your riding power, speed, air pressure, weight and put in an estimate of rolling resistance, but none of them are hard to do. You do need to be careful with your data collection though, as changing temperature and wind will affect things.
Once you’ve done that, it gives an accurate measure of your drag coefficient. The advantage is that it replicates real riding, as opposed to being a wind tunnel where you’re measured statically or on a turbo trainer. The disadvantage is that you need a suitable venue - preferably one where you can ride multiple laps without stopping - and data collection can be time consuming.
Try it here: www.cyclingpowermodels.com/CdAEstimation. aspx or download Golden Cheetah and make use of the aerolab function.
4 Velodrome
Cost: Velodromes are few and far between. To hire the one in Manchester costs £100 per hour, or £250 if you want exclusive use. Travel and accommodation are a cost factor. You’ll need a power meter too.
The beauty of testing your aerodynamics on a velodrome is that it’s a perfectly flat and windless environment. As a result, if you’re riding at an even power output and your speed improves, you know it must be because of your reduced drag. Similarly, if you try a new position or equipment and your speed drops for a given power, you know your drag must have increased.
5 Wind tunnel
Cost: Between £550 and £899 per hour
Travel far enough, pay enough money, and you can have a totally accurate measurement of your drag coefficient, as well as the valuable advice of an expert to help you achieve your optimum position.
The only potential downside, aside from the expense, is that a rider’s best position in a wind tunnel is not necessarily one they can maintain comfortably on the road.
This article was written by Phil Mosley, Phil is founder of the coaching business My Pro Coach.