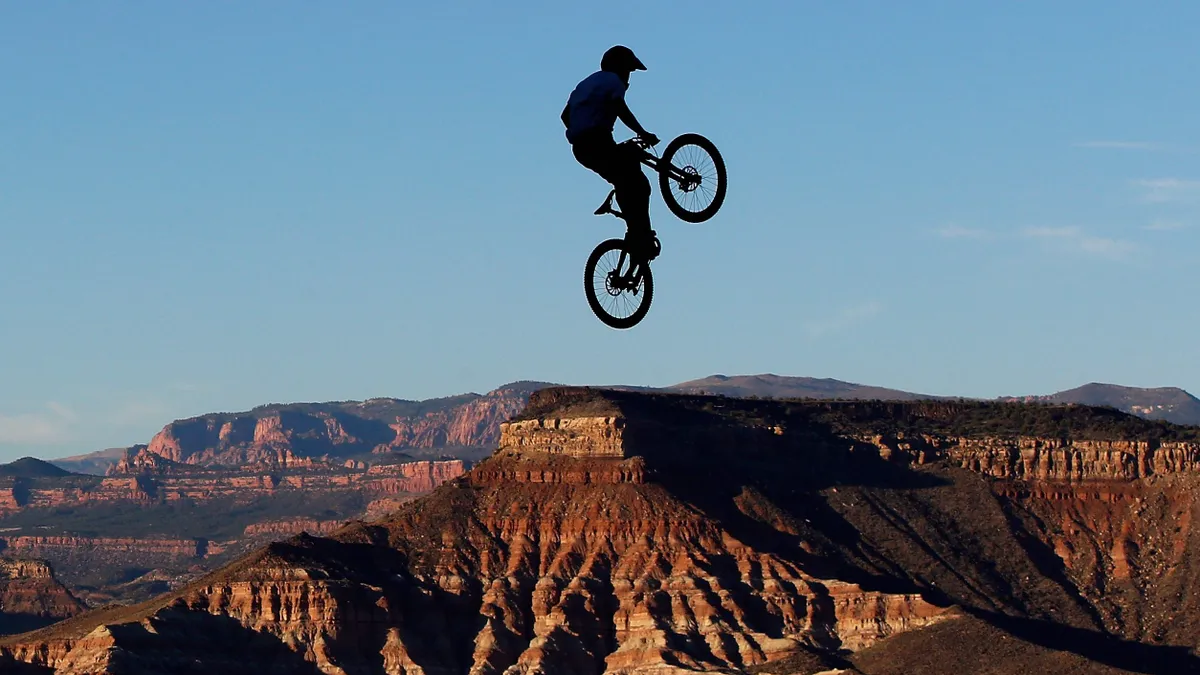
Learning to jump a mountain bike first requires you to find a proper jump you can practice on. Building things is fun, so let's look at how to build tabletops — a great place to start.
We'll then move on to building doubles, hip jumps and step-ups. For tips on learning how to ride the jumps, see our guide to how to jump a mountain bike.
The tools you'll need for building dirt jumps
- A sharp spade
- A shovel
- A medium-sized wood saw
- A gardening brush
- A wheelbarrow
- A gardening hoe
- A gardening fork
The rules of building dirt jumps
Only build where you have permission. Clean up after yourself.
How to build a tabletop jump in 11 easy steps
1. Clean up
First up, thoroughly clear any debris, etc from the area where you want your tabletop to stand.
2. Build solid foundations
Have a search for dead wood that you can use to make a solid foundation to your jump.
3. Scope out the centre of your jump
Lay the wood widthways across the table where you think the centre of the jump will be. This will make it easier when you want to turn your jump into a double (the idea is that you can pull out the middle without affecting the take-off or landing — more on that below).
4. Start digging
Now you need a whole load of earth. Dig a hole nearby (as close as possible), and keep it big and shallow.
5. Dump the earth on the logs
Load your freshly dug earth into a wheelbarrow and dump it over the logs to keep them secure. Carry on until they’re totally covered.
6. Pack it down
Level out the dirt using a rake or shovel and walk around on it to get it as compressed and as flat as possible, ready for the next soil load.
7. Get shaping
Once you’ve made the table, it’s time to shape it. Get the top as flat and compacted as you can, then use your feet to push the last two bike lengths of the jump into a gentle slope for the landing. Walk it down, then level it with a good whack from a flat, heavy shovel.
8. Shape the transition
Stand back and look at the top of the jump, the landing and how it meets the ground. Visualise the path your bike will take over that jump into the landing, and work out what the bike position at take off should be. A rule of thumb is to have a similar slope to the landing, only slightly steeper, and longer than your bike.
9. Smooth out the transition
Start smoothing it out like you did with the landing, walking it and flattening it, keeping the curve smooth and the shape steep.
10. Shape that lip
Shape the lip by rolling your bike up and down the take off to compact it, then use the shovel to smack it into shape. Start from the bottom and work your way over the ruts left by your tyres until your bike runs smoothly up and down, and there are no bumps.
11. Leave it to set
When you’re satisfied you've got the shape right, compact the top of the lip down hard and leave the jump to set. Rain and time will firm it down until it’s rideable — this could take as long as a week, but be patient. You might be riding this jump for years, so it’s definitely worth the wait. Good luck!
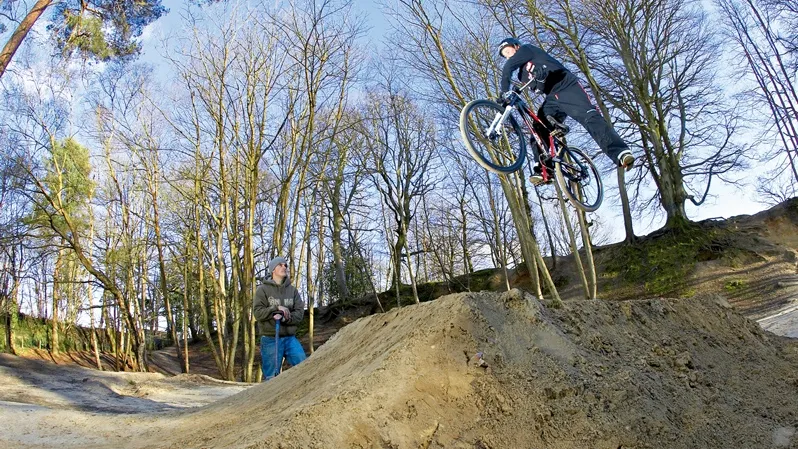
How to build small doubles
Once you’ve mastered your tabletop and are clearing it every time time, you can turn it into a small double, or gap jump, as it's also known. A double looks more difficult to jump than a tabletop, but it’s all psychological — they’re the same thing, just with less margin for error. And you can turn your tabletop into a double gradually, by lowering the middle a little at a time, to make it less scary. Here’s how to make the transformation.
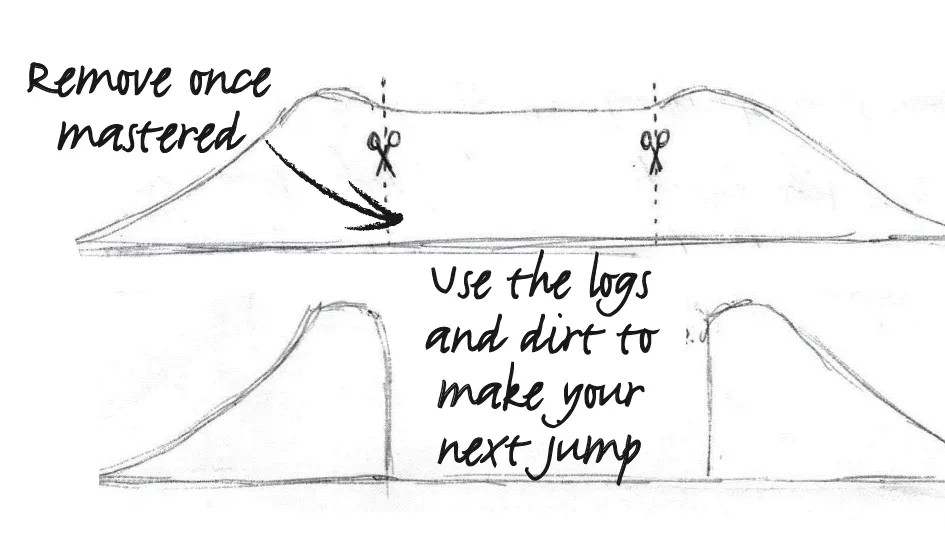
1. Start removing dirt from the middle
Gradually remove dirt from the top of the middle of the jump — if you do this part in stages, it will help you get used to the feeling of jumping a double.
2. Now you can pull out those logs
Remember those logs you laid down at the start of the building process? You can now pull these out from the middle without affecting the take-off or landing.
3. Smooth it
Smooth everything out, and voila! You now have a perfectly shaped double.
4. Reuse those logs and dirt
Use the logs and dirt to make your next jump.
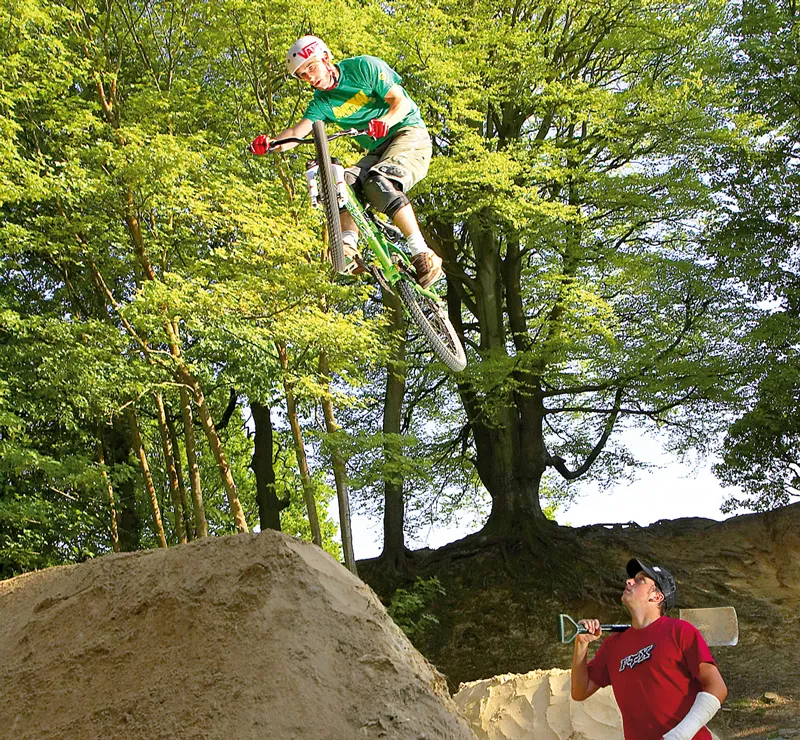
How to build big doubles
After mastering your small double, you’ll soon want something more challenging. A big double will give you more room for landing after ambitious tricks.
1. Plan it out
Firstly, make a plan. Aim for a 5ft-high double that’s about 6ft apart with a 10ft- to 12ft-wide landing. You’ll need a run-in that’s both clear of trees and smooth to ride. Your run-out will need space for building follow-up jumps too.
2. Pile up your logs
Collect branches and logs and saw them into convenient lengths. Arrange them in two piles, 6ft apart, to make a solid foundation.
3. Lay down the dirt
Begin piling the dirt on, starting with the landing. Make sure the logs are totally covered. Tread the dirt down as you go and keep building the landing up until it’s 5ft high, 8ft long and 10 to 12ft wide.
4. Shape it into a slope
Walk the back-end down into a nice gentle slope.
5. Pack it all down
Give everything a whack with a heavy shovel to pack it together (start with the back of the landing). Make sure the landing is at least a bike’s length long so there’s more room for error — two lengths is better.
6. Start building your take-off
Build up the take-off and pack it with the shovel.
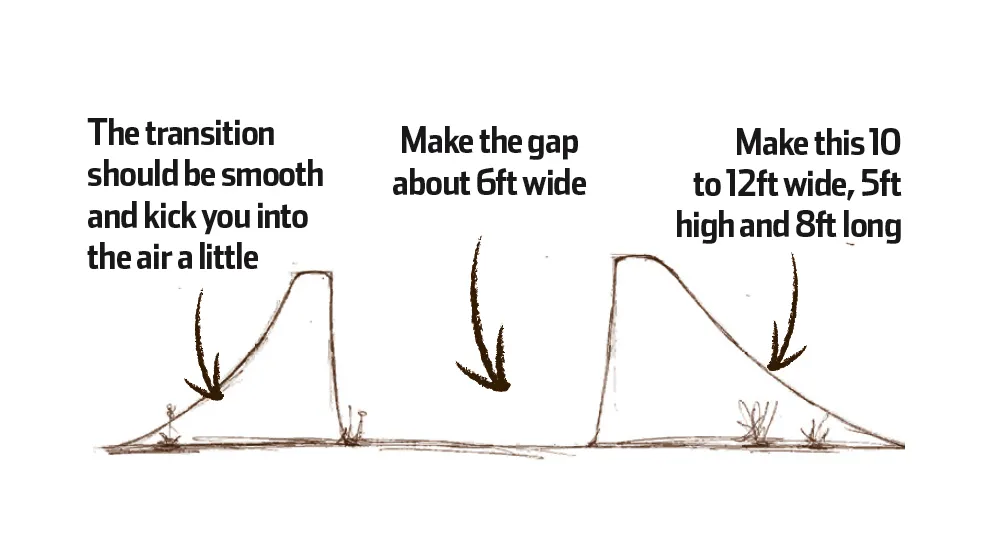
7. Shape the take-off
The curve of it must be longer than your bike, and the shape needs to kick you into the air a little. Check out the diagrams above if you don’t understand what we mean.
8. Smooth the take-off
Walk the take-off into a smooth slope, run the bike up and down it to form a curve and then whack it down solid with a sharpish spade rather than the shovel.
9. Leave it to set
A few days later it should hold its shape when you walk over it.
How to build hip jumps
A hip jump is a good way to link jumps at the end of the trails or give you more routes through sets of jump. Its landing is angled from the take-off, for turning in the air as you jump.
1. Find your location
Find an area to build your jump — UK freerider Chris Smith recommends creating a hip jump by adapting a natural feature, ideally a bank rising 45 degrees out of the ground, giving you a natural landing.
2. Clear the area
Clear the area of debris and rake it down so it’s as smooth as possible.
3. Start making your take-off
Shape a take-off transition into one end of the bank with a spade. It’s easier to stand at the top and carve the transition, then rake away excess dirt from the bottom of the jump.
4. Build your landing
Build a landing up to 45 degrees from the take-off, making sure it’s long enough for a safe landing.
5. Smooth it all off
Smooth everything off and leave it to set for a few days, until it holds its shape when you walk over it — that’s when it’s ready to ride.
Another way to build a hip jump is to add a landing to a tabletop you’ve already built — just build it at an angle to the take-off (up to 45 degrees).
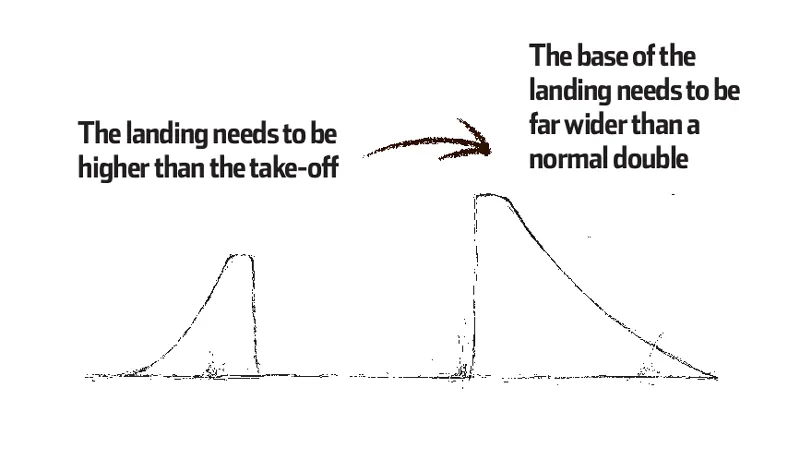
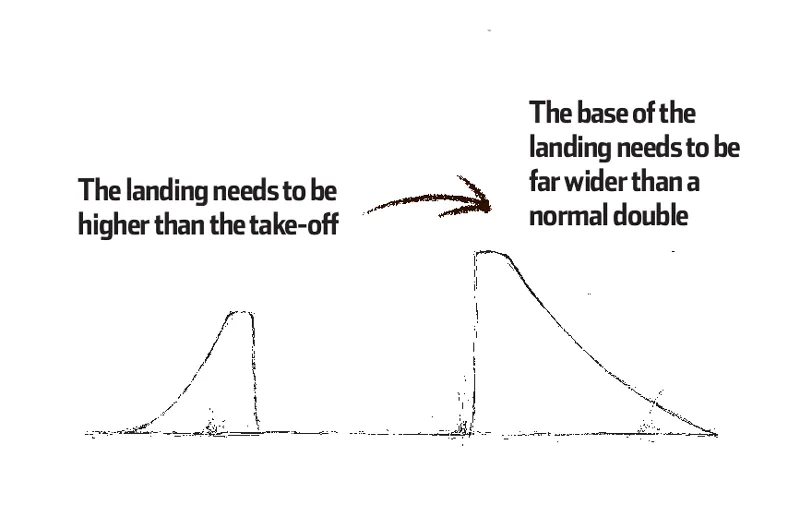
Step-ups
A step-up is essentially the same as a double, except that the landing is built much higher than the take-off. The landing also has a much longer base. We built a big double last time; here’s how to modify the process to end up with a step-up
1. Find your location
Find a suitable area for your step-up. You need one that’s clear of trees and with plenty of room for the take-off and landing.
2. Make your foundations
Arrange logs and branches into two piles to make a solid foundation. The two piles should be about 6ft apart.
3. Start building it up
Pile dirt on top of logs, making sure they are completely covered, and tread it down as you go.
4. Shape the landing
For step-ups, the landing needs to be higher than the take-off. Start off by making it about 3ft higher, so about 8ft tall overall.
5. Smooth out your landing
Walk the back-end down into a nice gentle slope, and use a shovel to whack it and pack it all down.
6. Remember to give the landing a wide base
As well as being higher, the landing also needs to have a wider base than a double. Otherwise you’ll find that the extra height will mean it will end up coming to a point rather than having a flat, level top.
7. Shape the take-off
Next, shape the take-off. It should be about 5ft high. As with the big double, the curve of the take-off needs to be longer than your bike, and the shape should kick you in the air a little.
8. Smooth it, smooth it
Walk it into a smooth slope, run the bike up and down it and whack it down.
9. Leave it to set
Leave it to set for a few days — when it holds its shape when you walk over it, it’s ready to ride.
How To Jump — MTB Skills