If you’ve been cycling for a while, chances are you’ve a few old components, or maybe even an unused bike, gathering dust in the shed or garage. If you’re not going to donate it to charity, resist the temptation to sell it for scrap or drop it at the dump. Instead, give your old bike and bits a new lease of life by using them to make a singlespeed machine.
Okay, some might think that opting for just one gear is jumping on the ‘trendy’ bandwagon, but by converting an old steed, you’ll be taking part in a venerable and virtuous tradition.
You’ll create an eco-bike with many uses and advantages: low gear winter training; improved pedalling technique; fun urban jungle riding; zen-like riding silence; and, perhaps best of all, low-to-no maintenance.
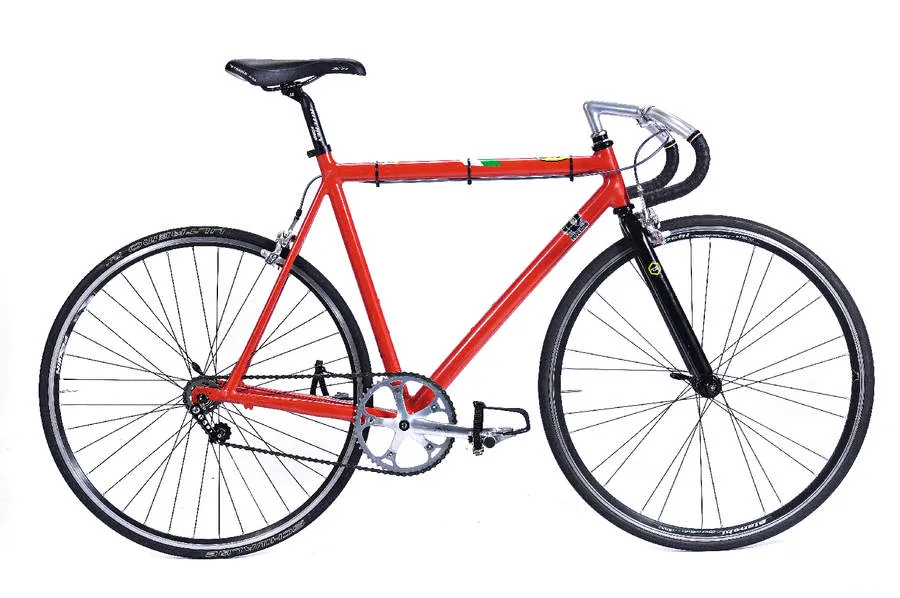
1] Measuring steerer length
The space a headset takes up is referred to as 'stack height' and tends to be around 42mm. Tange produces a model with a stack height of about 32mm that does the trick if your steerer is just a little bit too short.
Measure the frame's headtube, say 130mm. Add 42mm for a normal headset, plus a few spacers just in case (four 5mm washers). Measure the total (192mm in this case) onto the fork column from the crown race seat upwards and mark.
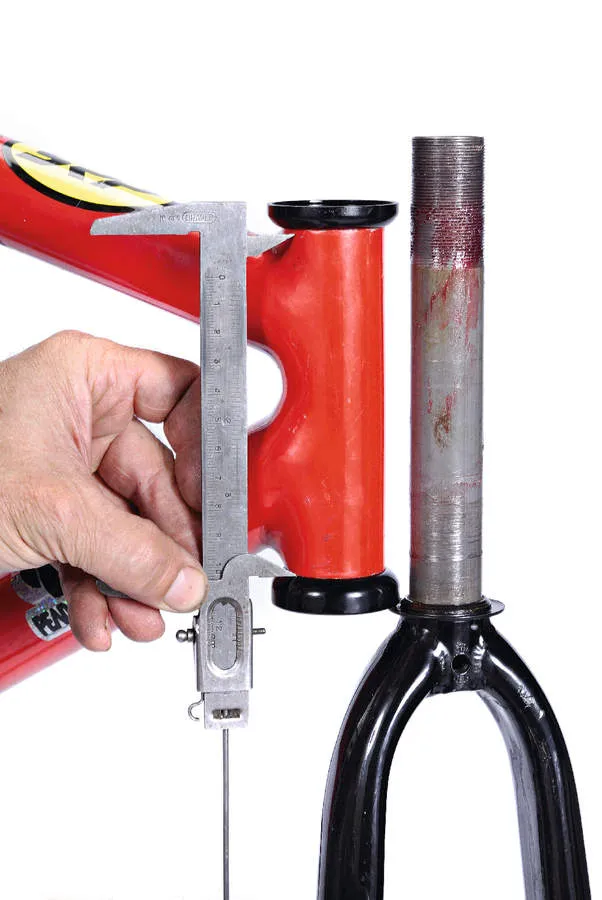
Thread the adjustable cup (preferably steel) down past the mark and cut, using it as a guide. Tidy the edges with a file, then back off the cup, cleaning the threads in the process. Blue threadlock on the top threads and locknut will prevent loosening.
2] Measure twice, cut once
If using a threaded fork, check that it's long enough to fit in the frame's headtube while allowing enough threads for the headset. With a threadless steerer, you'll need to check for the same length requirements.
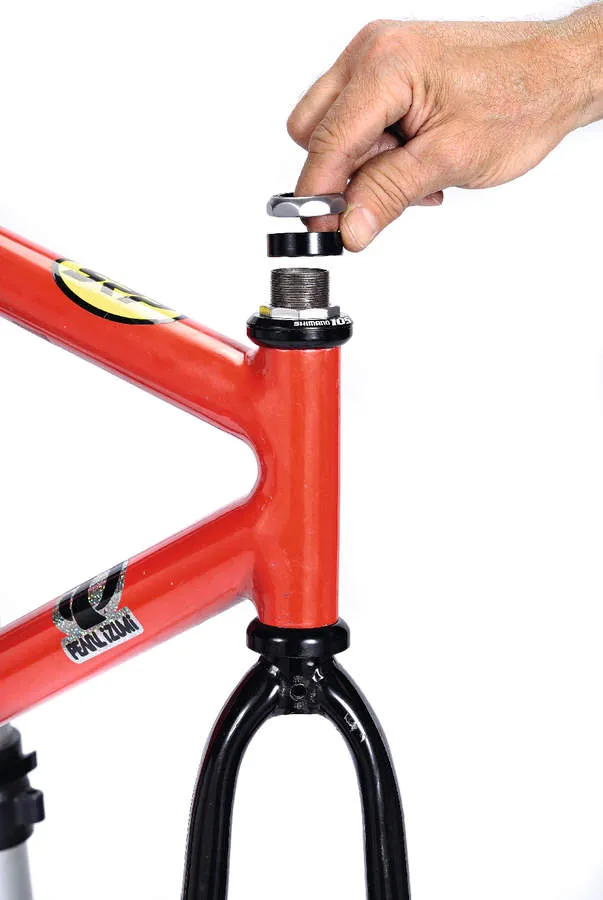
Assuming you've got a threadless fork with a diameter to match the frame's headtube, simply push it into the frame and slide the headset together, using the bearings, spacers and stem to determine what length will be required. Mark above the stem, then cut using a sharp hacksaw.
Don't worry if you've cut a bit longer – this can be dealt with easily by adding an extra washer. Grease, assemble and adjust with no play, but allowing free rotation.
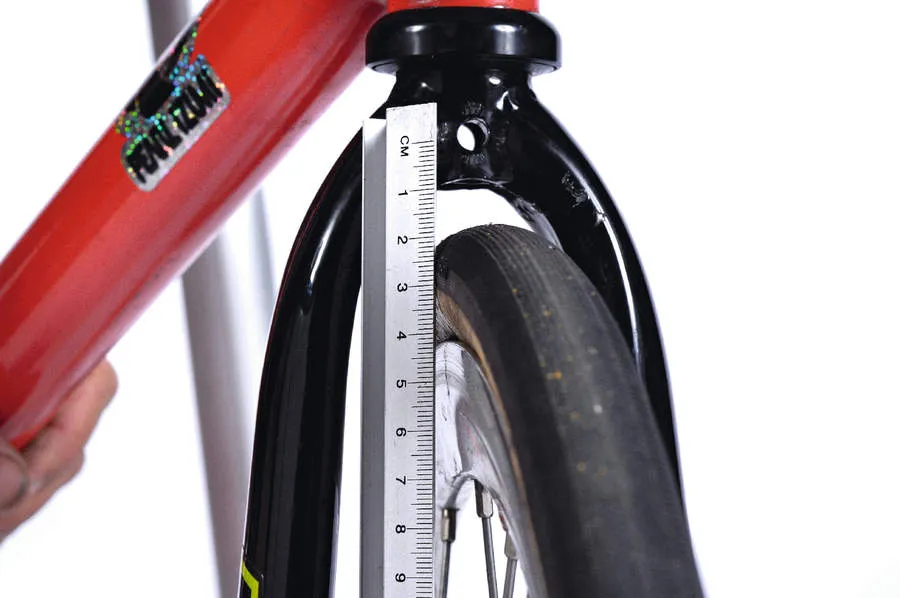
3] Check brake reach
This is a critical measurement, especially if you're trying to get an older frame on the road. Make sure the brake pads can reach the rim braking surfaces without touching the tyre – if the pad wears through the tyre, it could lead to a sudden blowout.
Measure from the centre of the brake bolt hole to the middle of the rim braking surface. You may find that it's a really old frame made for 27in wheels. If the old brakes don't provide enough reach, Shimano and Alhonga both make long reach versions of their dual pivot designs that will provide modern levels of braking power.
Longer reach dimensions tend to be 47mm to 57mm or more when measured from the centre of the brake pivot bolt to the centre of the pad bolt in its lowest position.
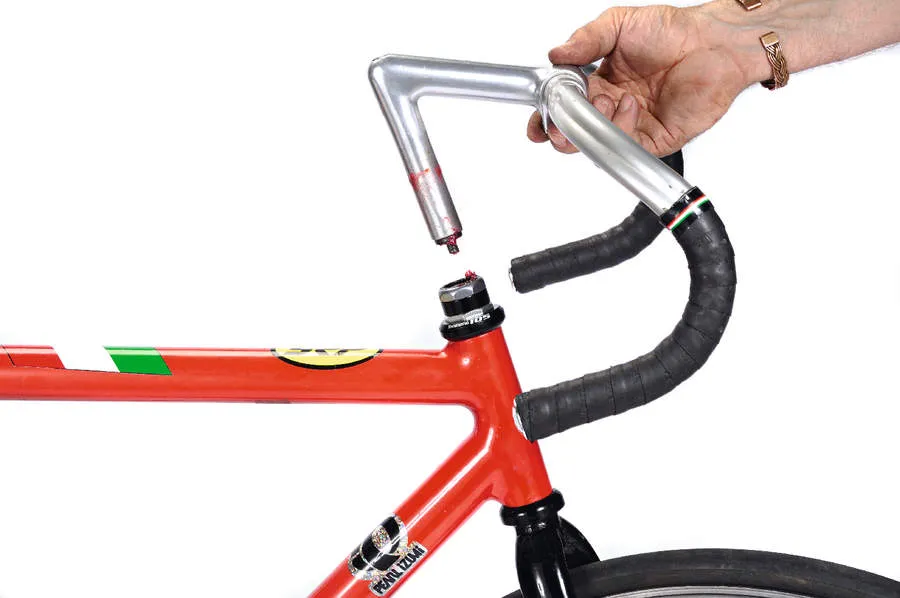
4] Old skool Kool-Aids
The Cinelli bar and stem pictured are a late '80s/early '90s track stem with big drop and a round criterium bar with a very high cool factor. These will definitely get you noticed in the urban singlespeed and fixie crowd.
These 'quill'-type units use a special bolt and wedge as a fixing method – grease threads and mating surfaces along with the inside of the steerer and outside of stem. You can never over-grease, especially if the bike is used for winter training.
They'll only work on a bike with a 1in compatible head tube and a threaded steerer, so if you have a 1 1/8in compatible frame and fork, you'll need to use a more contemporary clamp. You can still salvage a retro look if you happen to have an older standard bar diameter of 25.8/26.0.
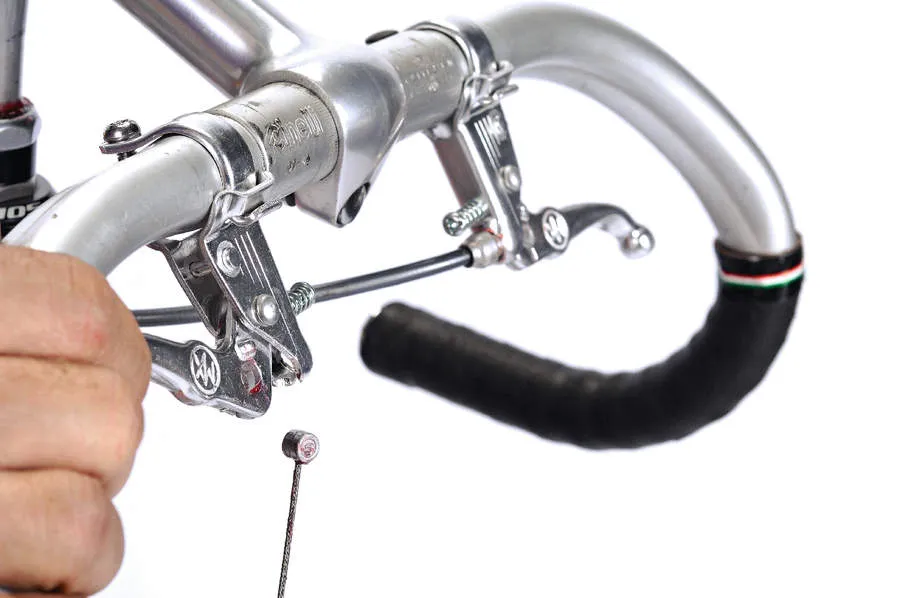
5] Special controls
Install your chosen brake levers (ours are Dia-Compe MX) in an appropriate and ergonomic position. Fixie riders will sometimes only run a front brake, but with a freewheeling singlespeed, two brakes are essential.
Notice the barrel shaped cable end – different to the pear shape found on road cables. Other lever options include plug-in Dia-Compe or Tektro aero bar levers. Size and cut your brake cable housing to the correct length, making sure there's enough to accommodate turning the bars, and don't use indexing gear outers.
Use ferrules where possible and apply a light grease or medium oil to the inners before stringing them through. Turn barrel adjusters all the way in, anchor cable firmly and put a crimp on the exposed end.
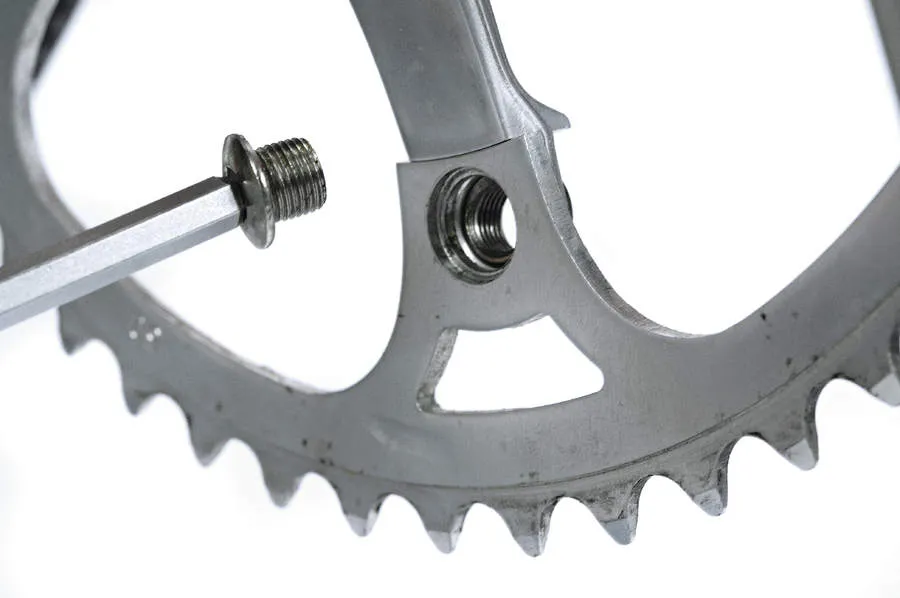
6] Modify the crankset
A three-to-one ratio between chainring and cog seems to be the current favourite, providing a high enough top speed to keep up with traffic, while allowing decent acceleration and mild climbing capability (it could also help build up a bit of upper body strength in the process).
Choosing a 48-tooth ring with a 16-tooth cog gives you an 81in gear and both the ring and shorter bolts required are fairly common. The chainring bolt circle diameter for double cranksets is usually 130 for most brands other than Campagnolo, which is 135.
A good bike shop should be able to order the Stronglight or TA aftermarket chainrings and bolts favoured by the custom-gear ratio crowd. Grease generously to avoid annoying creaks and ticks during the rainy season and tighten firmly.
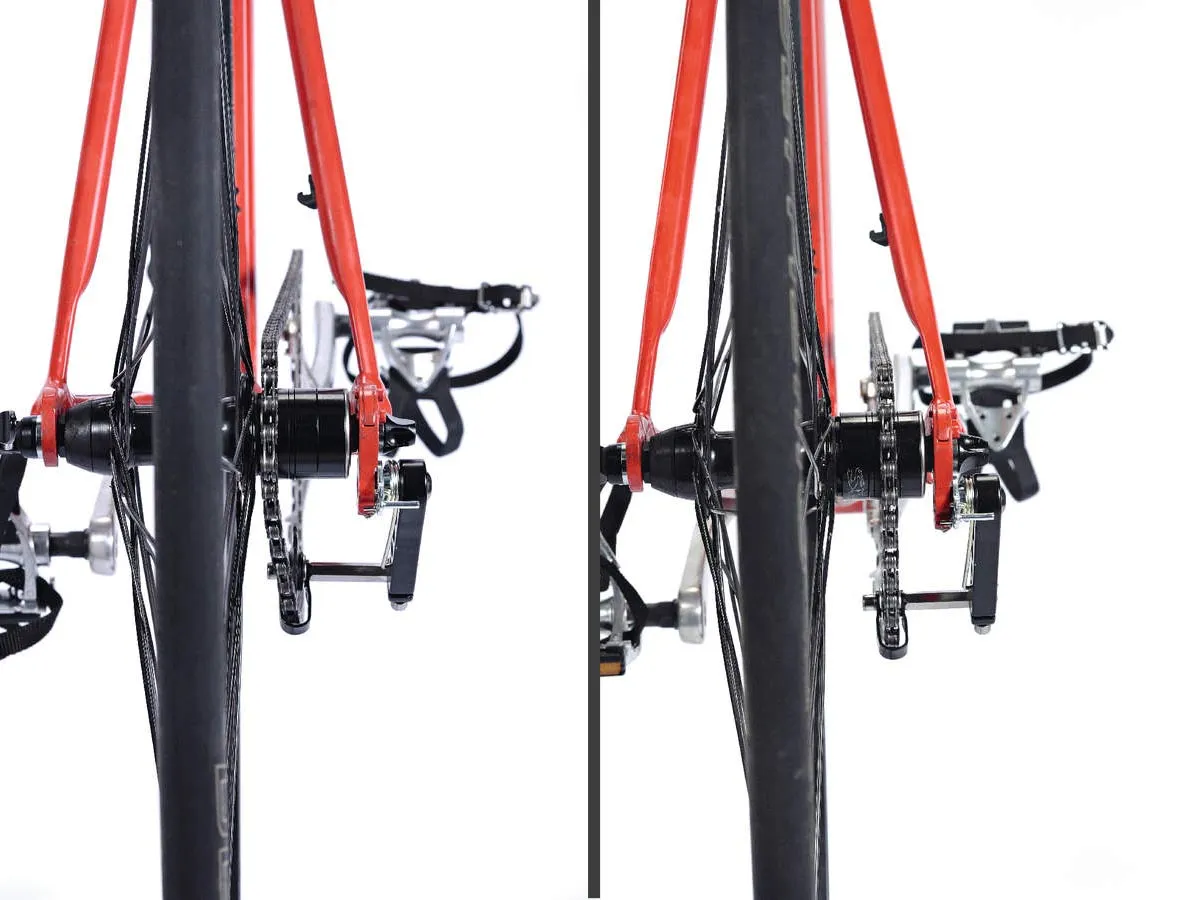
7] Spaced out
There are now several spacing kits available on the market, thanks to the popularity of singlespeed mountain biking. DMR and Surly come to mind, because both feature a series of attractive spacers that make use of old cassette cogs and lockrings.
Alternatively, you could make your own with the old spacers, although not all cassettes will lend themselves to being taken apart. Some of the cogs will be attached to an alloy spider with rivets.
Shimano's HG 50 series (105) and below, along with low to mid-range SRAM and Sun-Race cassettes, use separate all-steel cogs that are held in place by three long pins. These can be either unscrewed or ground down to free the cogs.
The nylon spacers between the cogs can be used to fill the gaps on the freehub, although an additional spacer or two might be called for.
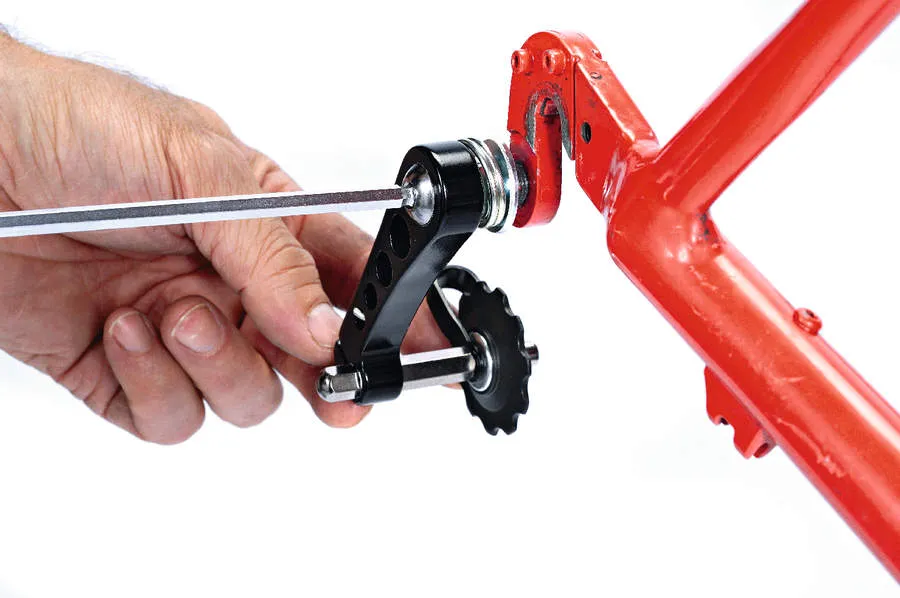
8] Adjust chain length
If you're really lucky, you could end up with a chain length that works without the use of a tensioner. This is more likely if you have the semi-horizontal or slightly longer drop out slots found on steel (and some alloy) frames.
See if you can find a link that matches up with the wheel in its most forward position. A SRAM Powerlink is safe to use and makes life easier, but the whole process can be tricky and involve a lot of trial and error. Invariably, you'll have to call on one of many chain tensioning devices on the market – the DMR STS, for example.
Grease the threads and install the tensioner in place of the old derailleur. Two types are available: spring or no spring. Use the spring tensioned version and enjoy the peace and quiet of a single jockey wheel.
9] Check chain line
Check that the chain line is reasonably straight. You can get away with a little left or right variation, especially with a 3/32in (derailleur type) chain. They're a bit more flexible than a 1/2in by 1/8in pitch chain and will still run smoothly when climbing the chainring from a slight angle.
It's nicer to get it right, though. Swap spacers as required, then lightly grease the spacers, cog and freehub lockring and tighten firmly without overdoing it (the serrations on the lockring should keep it from working its way loose).
It's a good idea to place a metal washer against the inside edge of the freehub body as a first space. This will keep the cog running true – the nylon spacers can get distorted if the lock ring is overtightened.
10] Make final tweaks
Take a test ride to locate any small problems and iron them out. Check for pedal overlap, adequate braking power and brake lever placement. Install any final parts: pedals, a cool bell, maybe some eco-splash guards fashioned from plastic milk jugs and zip ties! Assess the handling – a small variation in fork offset shouldn't drastically change the behaviour of the bike.
Most important is headset adjustment. Ensure this is not too tight because it can cause the headset to get indented and interfere with the balance of the bike. After a couple of rides, re-check the chain and tensioner.
Keep the bike clean if you can and make a habit of checking critical components for early signs of failure like small cracks.
Singlespeed supplies
- Ison Distribution supply most widgets required for conversions of all types – most usefully, the 4-Jeri chain tensioner, £17.50, Surly cassette cogs, from £17.99, and the Surly singlespeed spacer kit, £29.99
- DMR do a useful selection of well-designed products suitable for single speed projects too: see Upgrade Bikes
- For TA chainrings and bolts, square taper crank arms and BBs, see Chicken Cycle-kit
- For old school and classic kit, Dia-Compe bits, SRAM PC1 chains, track cranks and cogs, Stronglight chainrings and bolts and anything else hard to find, try J D Whiskers (01707 326115) or Mercian