There are all kinds of small but significant steps that can be taken to reduce your environmental impact as a cyclist, ranging from the lights you choose to the way you perform repairs and maintenance.
The extraction of the raw materials and the production methods used to make bikes – such as aluminium, carbon, steel, titanium and rubber – are known to have a negative environmental impact.
The battle for access to new lithium supplies is also well under way, and makes for depressing reading. Although just riding a bike goes a long way towards offsetting this damage, you can take it further with the following tips.
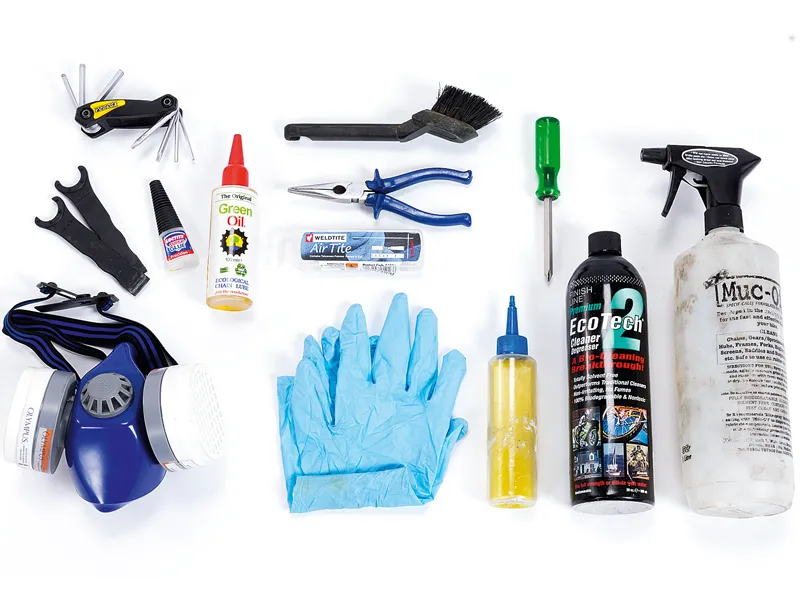
Tools required
- Cleaning equipment
- Vegetable oil,
- Green Oil Citrus degreaser
- Protective mask and gloves
- Proofide,
- beeswax
- Patch kit,
- super glue
- Multi-tool,
- wire cutters
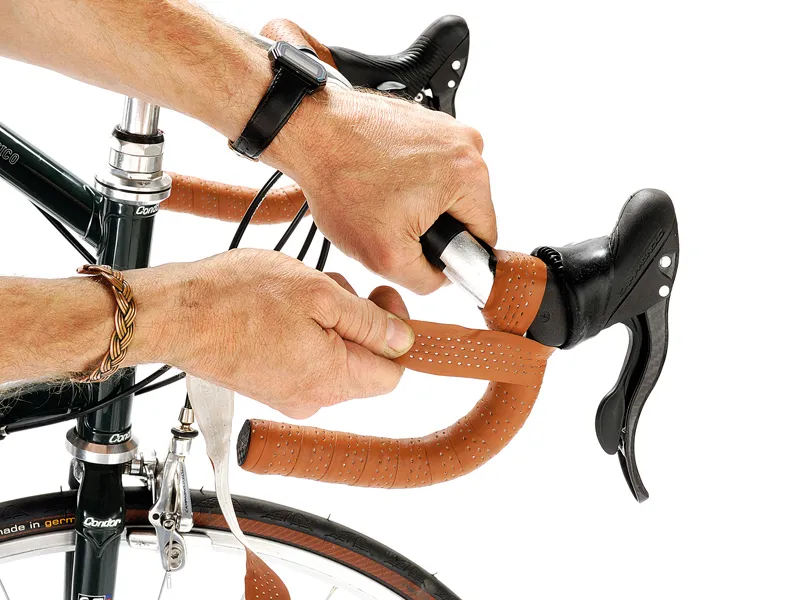
1 Go natural: Use leather bar tape
Leather tape is cosy, provides a breathable grip and improves with age. It attracts a higher premium, but is incredibly tough and can outlast four or more rolls of synthetic tape. Pick a dark colour if you want it to look fresh for longer. Honey-coloured leather will darken where it’s held as it ages, but you can always even it out with a bit of brown shoe polish. Install the tape in a warm room and let the bar and tape warm up before you start – a cold garage will reduce adhesion and stiffen the leather. Wind from the bottom up. On sharper bends, minimise the chance of visible folds by pulling and holding the tape for a moment while tensioned, overlapping by about a third of the width.
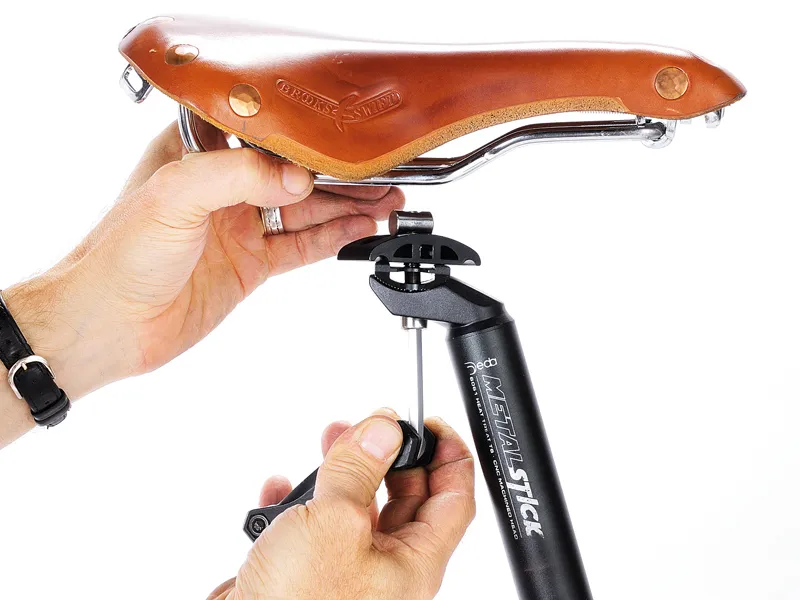
2 Install and care for a full-leather saddle
You’ve got to love full-leather saddles – their conservative design stands the test of time. Companies such as Brooks are actively searching for ever friendlier ways of tanning leather, and great strides have been made in reducing the impact of manufacturing what’s already an efficient and long-lasting product. Care for yours by using beeswax or Proofide, which form a natural and effective protective layer. Brush away any dirt from under the saddle and apply a generous coating as a protective paste. It will act as a waterproofing layer, while your body heat will pull some through and keep your saddle soft. When wet, allow your saddle to dry naturally, keeping it away from radiators.
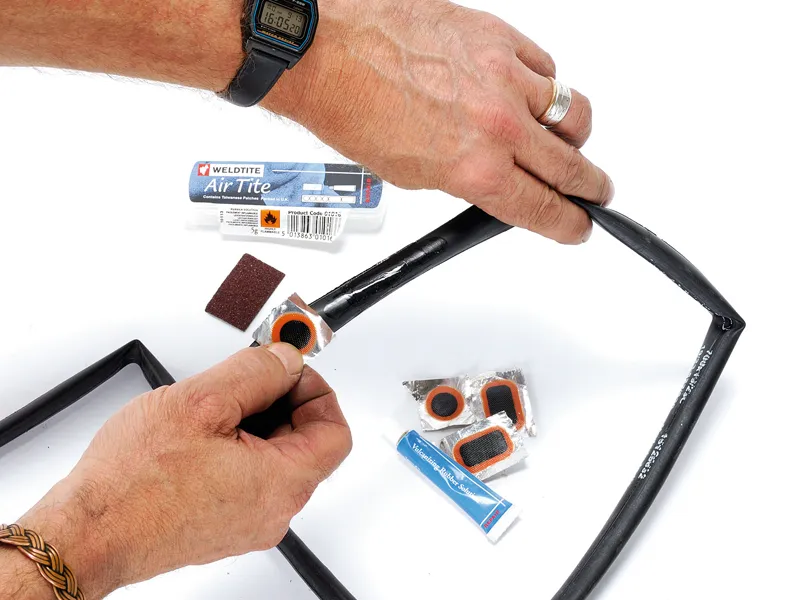
3 Recycle rubber
Fixing inner tubes makes sense. Although online bulk prices make throwing away tubes easy and hassle free, it’s greener not to. Instead, get a patch kit and reuse your tubes. To fix them, first match the location of the puncture on both tyre and tube, and remove any sharp objects. Now pull the tube out, and scrub an area a bit larger than the chosen patch around the puncture with the emery paper provided in the kit. Apply a generous dollop of rubber cement and spread it thinly and evenly. Allow it to dry for five minutes or more – apply the patch too soon and the edges will lift and it will probably fail. Add the patch and work it with your fingers for a bit, then reassemble your wheel before inflating to the correct pressure.
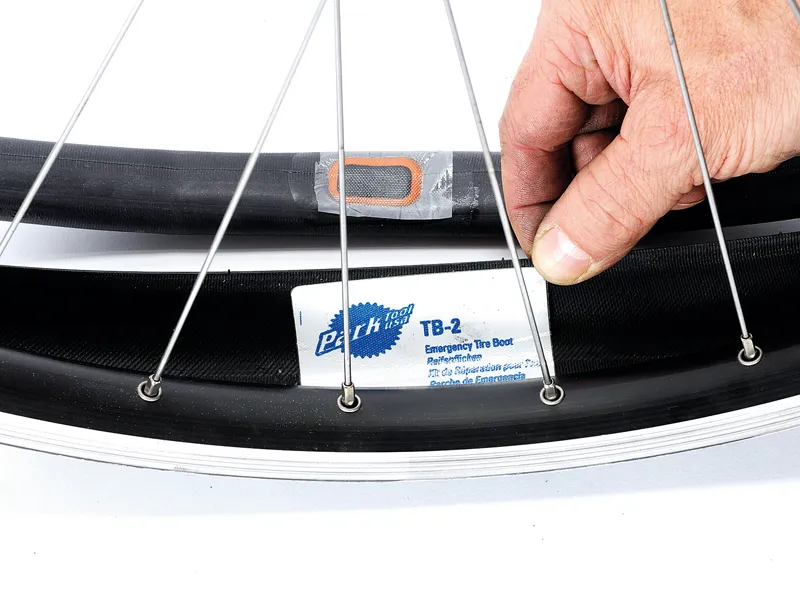
4 Tyre care
Extend the life of your tyres by repairing minor damage. Inspect closely for small cuts and embedded bits of glass or sharp debris. You can remove shrapnel with a small scribe or suitable tool, and any cuts larger than about 2mm can be healed. Deflate the tyre until it just holds its shape. Apply a drop of super glue to the cut, then press down on it with the round end of a screwdriver handle or a tyre lever and hold for about 10 seconds. Do the same over larger casing cuts where you’ve installed a boot, such as Park’s excellent pre-cut and ready-to-use version, as pictured. Keep in mind that this repair will be riskier on higher pressure tyres, so keep pressures below 100psi and only use booted tyres on the rear wheel.
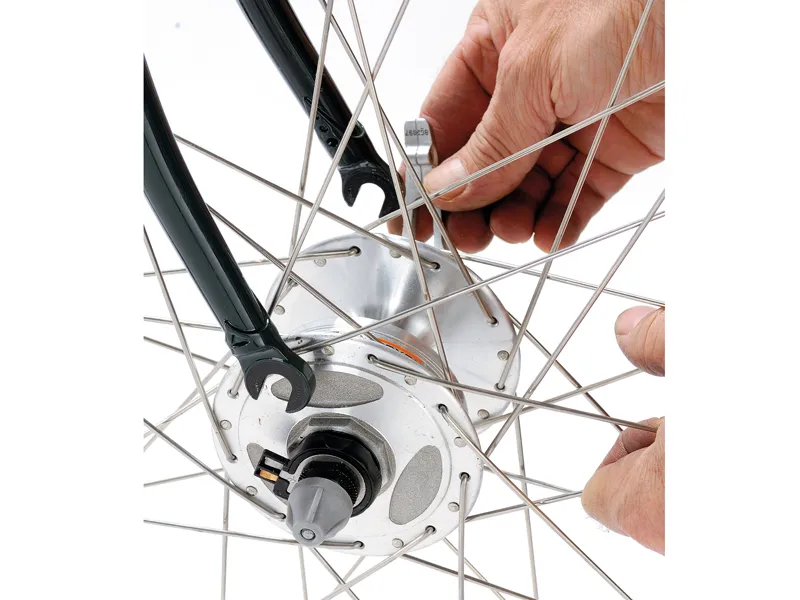
5 Toxic avenger: Dynamo power!
Avoid lithium dependency and power your lights with a hub dynamo. Today’s models are efficient and hassle free, and produce much less resistance than bottle dynamos of yore. For sheer luxury, Schmidt does an excellent unit for around £180. Shimano also offers several versions from £40 upwards. Choose a quick-release version for ease of installation. A 3 watt output will also have enough extra kick to drive a tail light. Position the plug on the drive side of the fork and position it for ease of access. Cut the wires to size and route them inside the right fork blade with zip ties. Use the provided plug, or crimp or solder standard-issue plugs, using shrinkwrap to protect the wire’s contact point.
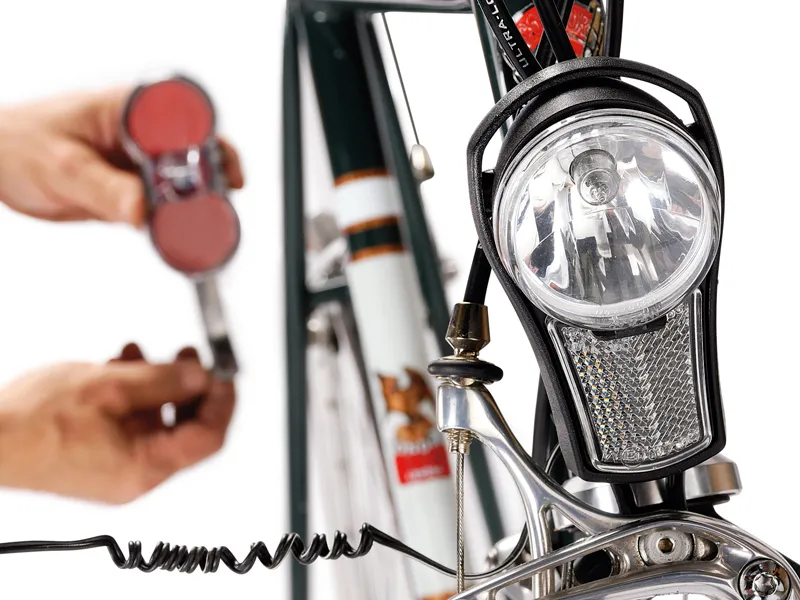
6 Let there be light
Go for a headlamp unit that features an on/off switch and extra plugs for a rear lamp, as well as allowing it to be earthed in a closed circuit rather than using the frame. The latter is especially pertinent if you have an all-carbon bike. Choose a suitable lamp bracket with sufficient offset and height to clear both the brake calliper and the lower headset cup. A star washer will keep the light and calliper from slipping sideways. Worried about stopping at traffic lights at night and the lights going out? Busch and Muller produces both front and rear models that include a useful and visible LED stand light, powered by a built-in capacitor, which stores enough juice after just a few seconds of riding to stay lit when stationary.
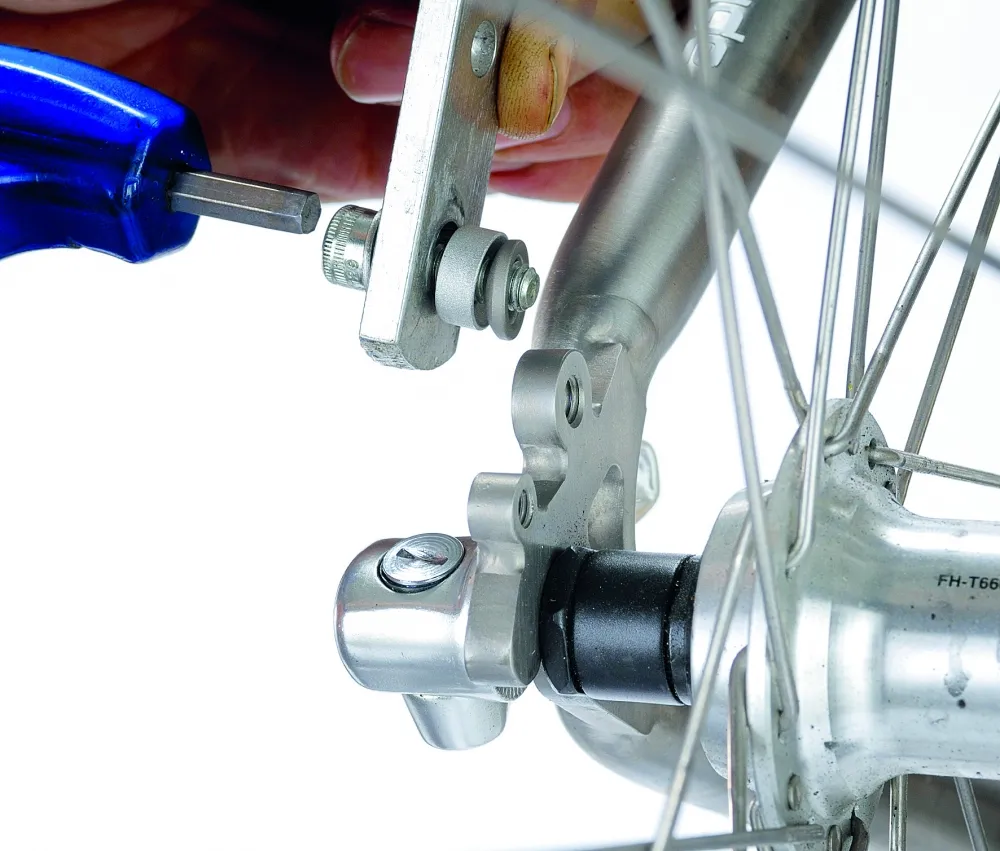
7 Let's go shopping
You’re more likely to avoid using the car the next time you head to the shops if you’ve installed a rack with a set of panniers on your bike and have a lock at the ready. To install a rack, start by comparing it to your bike and noting the braze-on positions. Use salvaged concave/convex washers from V blocks as spacers to help accommodate variations in the angle of the rack struts relative to the frame and eyelets. Use them in conjunction with a longer bolt to clear cumbersome disc callipers. Upper brackets also tend to be troublesome when it comes to adapting a rack to your bike. If they just won’t mate up correctly with your seatstay eyelets, try using P clips, or a single 90-degree bracket designed to mount on the brake bridge bolt.
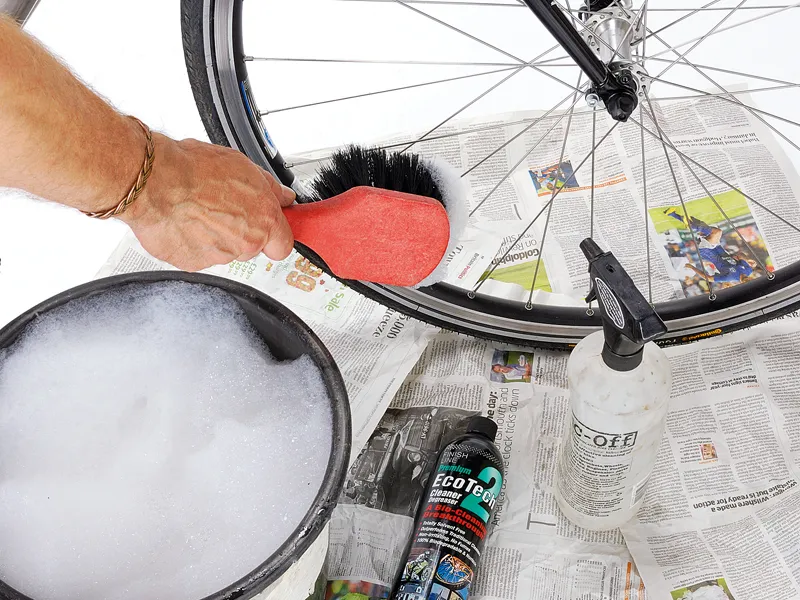
8 Cleaning green
Use the right cleaning products and techniques to prevent contamination of soil, ground water and our planet’s oceans. Citrus-based cleaners made by the likes of Pedro’s and Green Oil offer a safer way forward. A bucket of warm water with a dash of washing up liquid and citrus degreaser will do the trick. Spread old newspapers widely underneath the bike before cleaning to act as an absorbent for the water and residue, then bag them up when done. One full bucket should just about wash two bikes if they’re not too dirty. Better still, wipe your bike down after every ride. If it’s dry, gently brush away any grit with a soft brush first before you give it a wipe with a damp cloth soaked with a bit of citrus degreaser – sort of like a bicycle sponge bath.
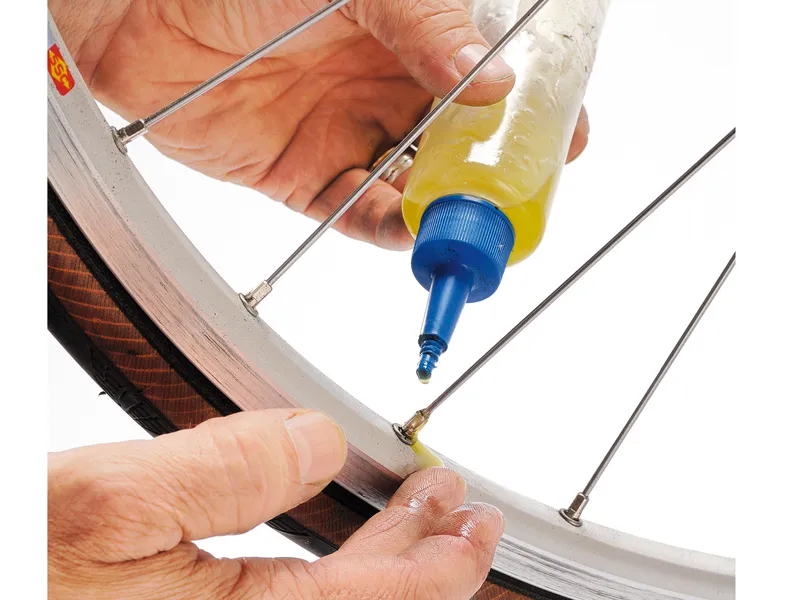
9 Lubing green
Use natural lubricants wherever possible. Olive or sunfl ower oils make good all-round lubricants for non-moving parts, such as nuts, bolts, exposed metal surfaces and especially threads. Save an empty oil bottle and decant a bit of your favourite oil into it. It’s particularly effective when building or servicing wheels – a couple of drops on the spoke threads, nipples and eyelets will keep away oxidation, while acting as a soft thread-locking compound as the oil ages. But it’s not advisable to use this oil on moving parts, such as chains and derailleur pivots, unless periodically cleaned with soap and reapplied. Better to use one of the specially formulated green lubricants on offer, which are designed not to gum up.
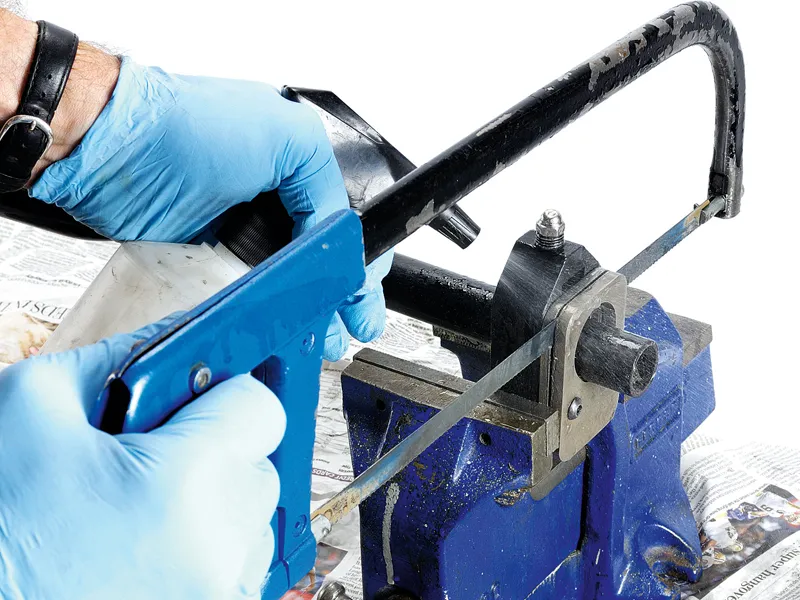
10 Zero-emissions: Cutting carbon
Working on bikes will always present some sort of eco-compromise. Carbon fibre offcuts should be treated as hazardous and disposed of according to local guidelines. Treat them with the same care you would batteries or household chemicals. When trimming carbon components, minimise your exposure with a quality mask and gloves. To further reduce the risk of inhalation of carbon dust, place a generous number of ruffled sheets of newspaper below the cutting area, fill an empty spray bottle with a mixture of water and a dash of washing up liquid, and mist over the area while cutting. This will damp down nearly all of the dust. Then bag and dispose of the wet paper. Don’t vacuum.